


We're here with another tutorial on how to best use Quickbooks for your business
This post quickly outlines how to manage your Chart of Accounts in QB Online!
What is a Chart of Accounts?
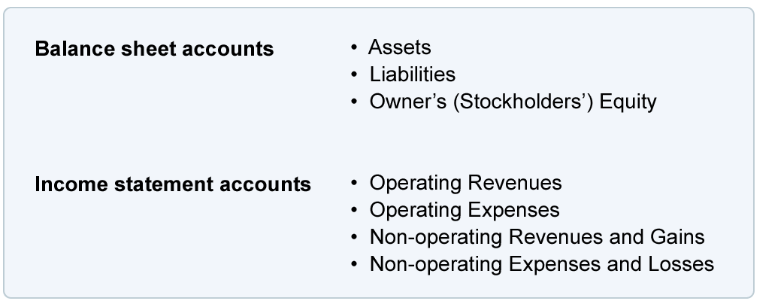
A chart of accounts (COA) is a financial organizational tool that provides a complete listing of every account in an accounting system. An account is a unique record for each type of asset, liability, equity, revenue, and expense.
Within the chart of accounts, accounts are typically listed in the following order:
How to set up different accounts in QuickBooks Online
QuickBooks Online comes with some already set accounts. You can delete those accounts and add new ones as required.
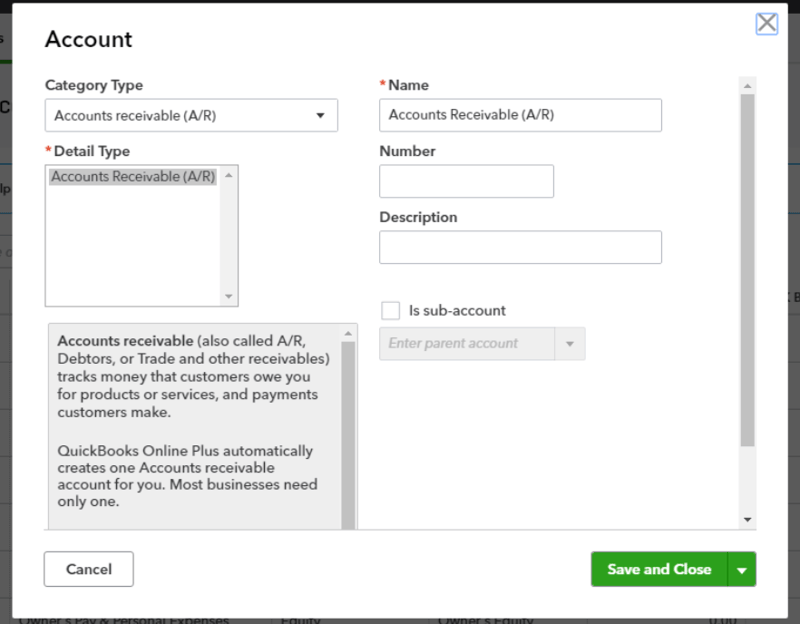
There are some accounts which can’t be deleted or altered. These accounts are called System Accounts. These are created by Quickbooks Online and include Accounts Receivable and Accounts Payable.
You can add a new account, delete or edit existing accounts by going to "Chart of Accounts" from the gear button as shown below.
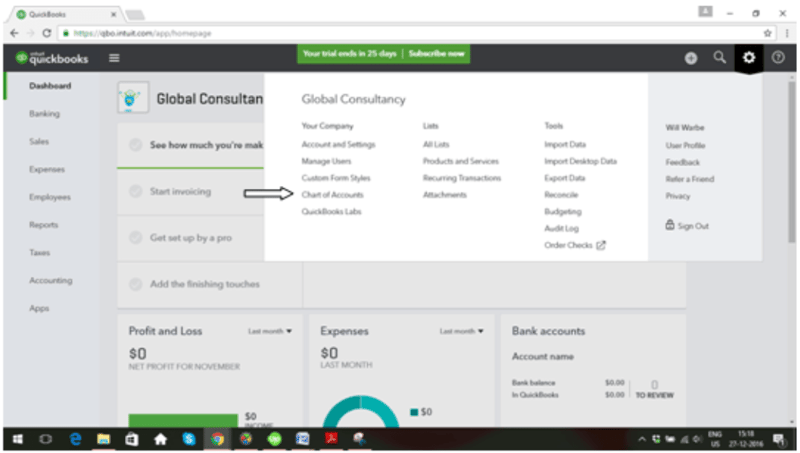
Once you click on "Chart of Accounts", a new screen will open.
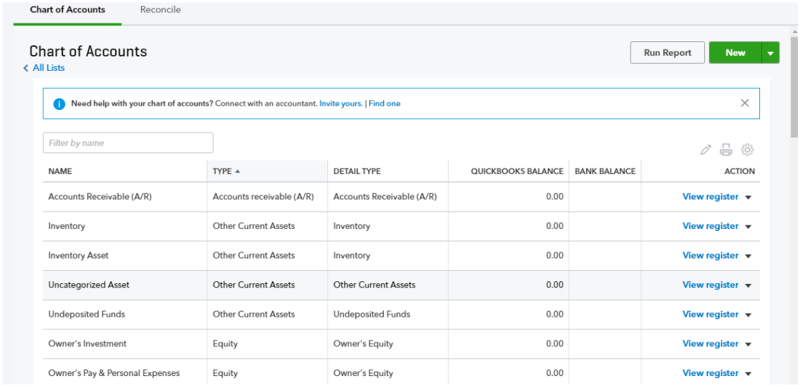
You can create a new account by clicking on the "New" button in the upper right corner. The following screen will appear.
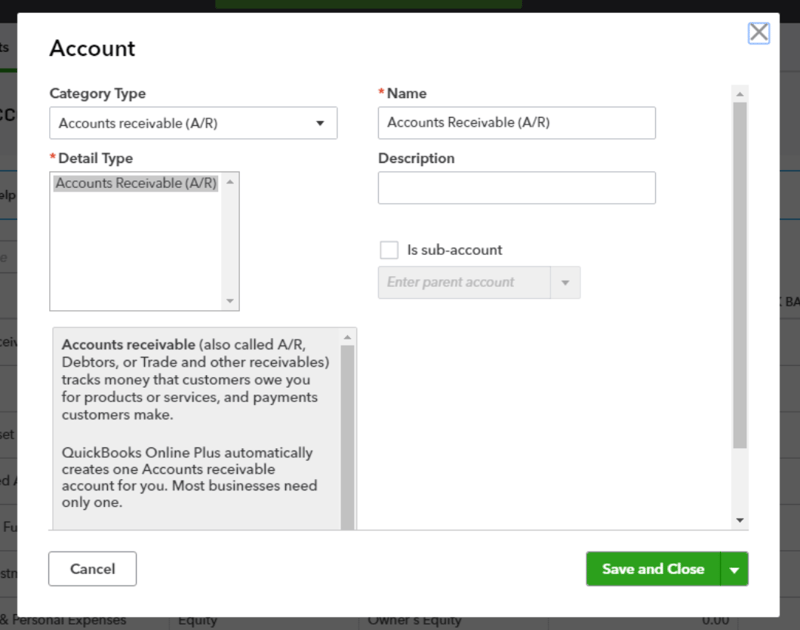
Under "Category Type", there are basic categories. You need to select one category according to the account being created. These basic categories determine how an account will be accounted for under different reports. It is important that you select a correct category for each account. Please note that you can change it later if you accidentally chose the wrong one.
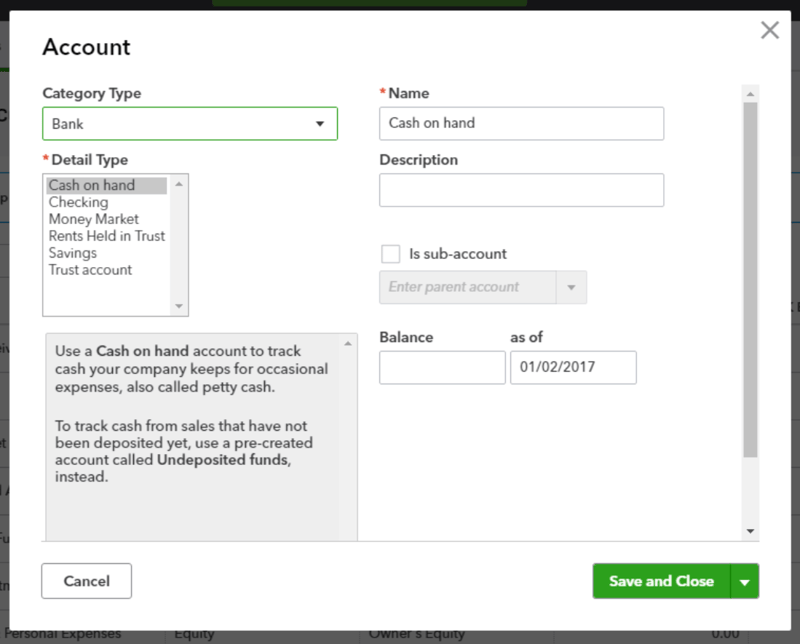
Once the category type is selected, the next step is "Detail Type". "Detail Type" describes and suggests some accounts which are normally covered under particular category types. As below, the category type “Bank” shows different types of accounts you can have.
Next is "Name". This is the name of the account you are creating. You can override the “Detail Type” name appearing under "Name".
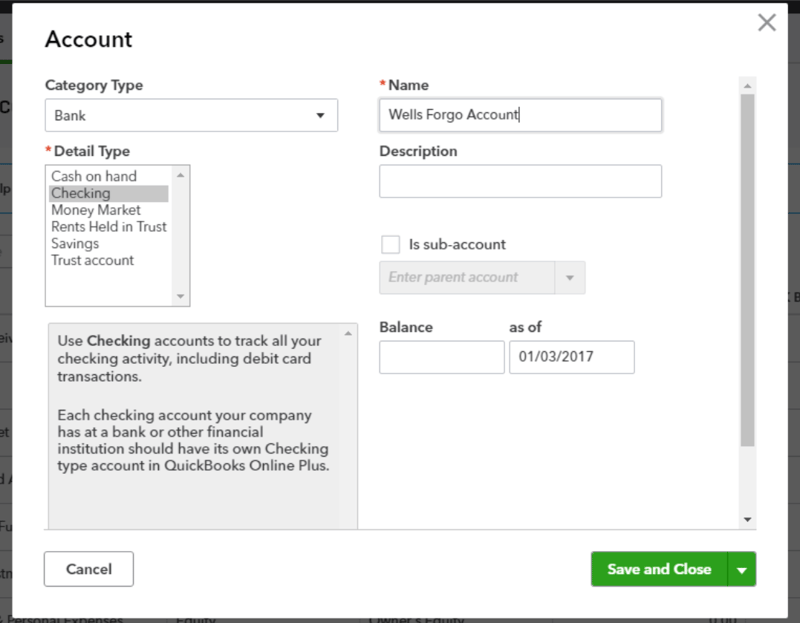
As you can see that here "Checking" is selected but it’s been renamed to Wells Forgo Account.
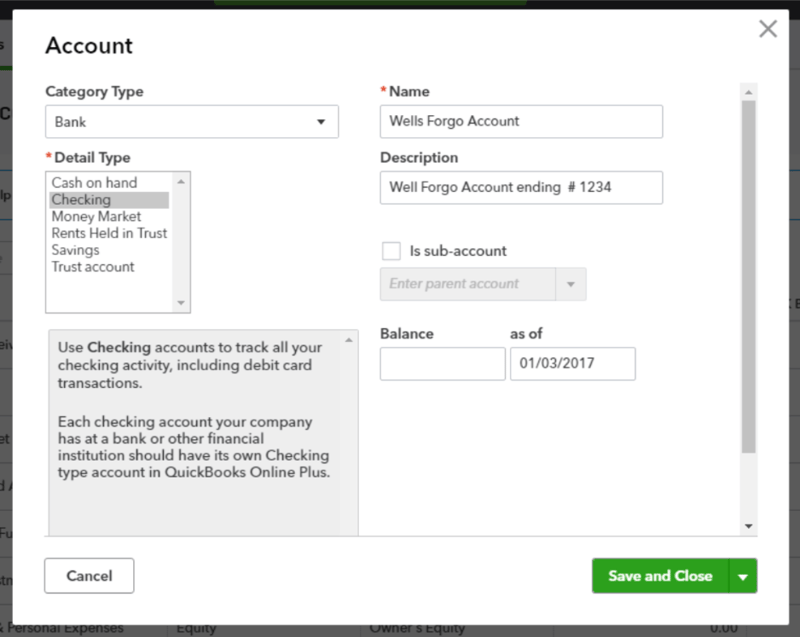
In the description column, you can put details regarding this account like “Wells Fargo Account ending #1234” as shown below.
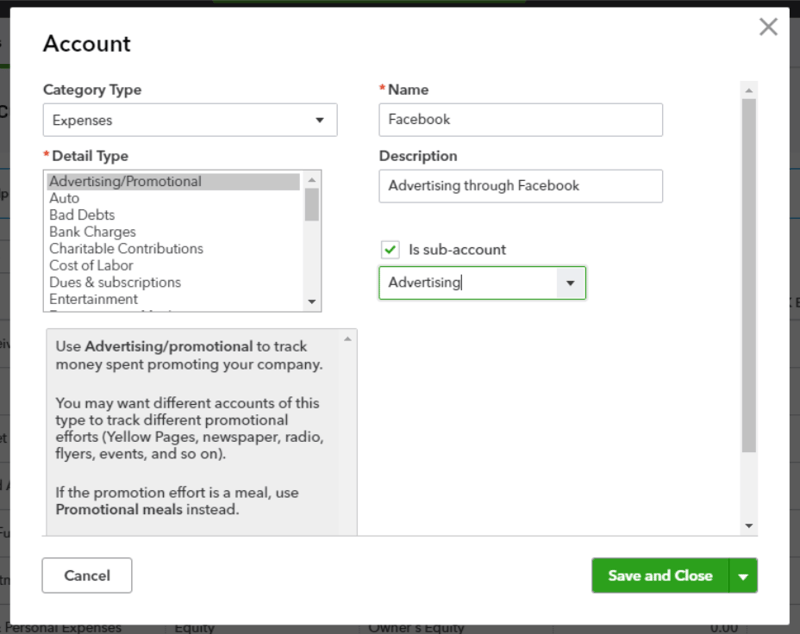
Sub Account:
Quickbooks provides a "Sub-Account" functionality, which is a powerful reporting tool.
"Sub Account" is a functionality where you can have a "Main Account" (called parent account) with multiple accounts under it. Say you want to track Advertising on different advertising channels such as Google, Facebook, Print media, & Twitter etc.
In this case, you can have a "Main Account", Advertising, and many different "Sub Accounts" under it, such as Facebook, Google, and Twitter etc. You have to create the "Main Account" first and "Sub Accounts" after that.
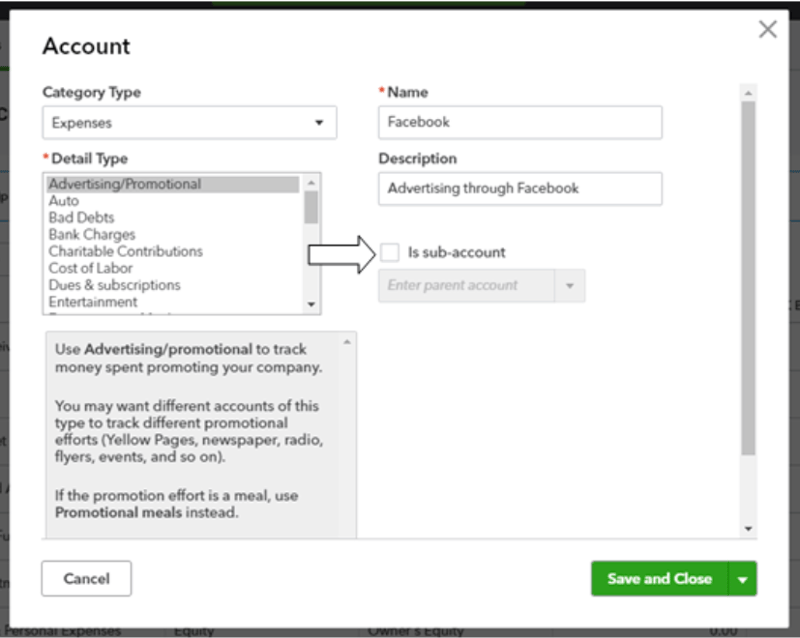
If you want any account to be a "Sub-Account" of a "Main Account", you can click on the checkbox as shown below.
Once you check the box, a field is exposed wanting you to choose a "Main Account".
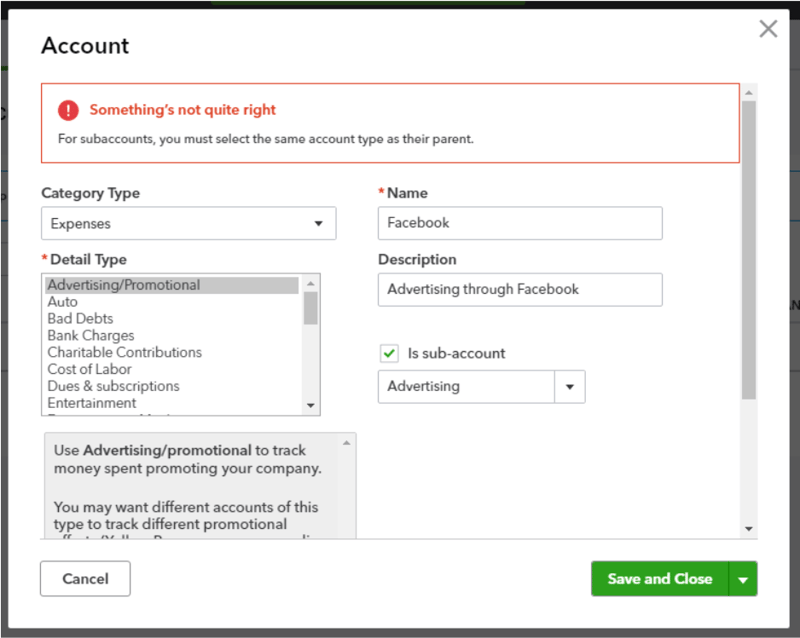
You need to make sure that the "Main Account" and all required "Sub-Accounts" have the same “Category Type.” If these are not the same, Quickbooks will show a warning message and won't allow you to create the account.
Account Numbers:
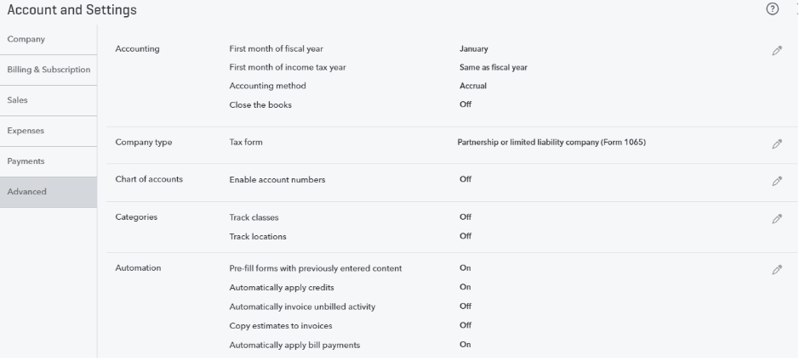
Quickbooks also allows you to assign account numbers to accounts. For this, you need the "Enable account numbers" feature under "Chart of Accounts" to be "On". This is in ”Off” mode by default.
You can do that by going to "Accounts and Settings" from the gear icon and then to "Advanced" on the left-hand side.
Click on the pencil icon and check "Enable accounts numbers" and click "Save".
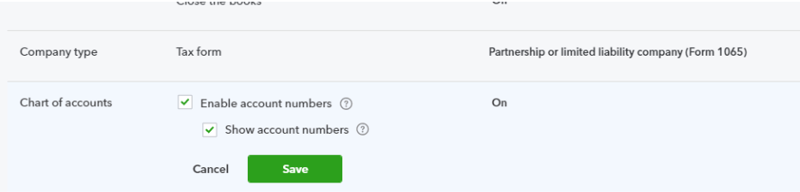
Once this is turned on, a new field labeled "Account Number" will appear on the left-hand side in the "Chart of Accounts" screen.
This field will also show when creating new accounts.
Botkeeper works very closely with QBO to make sure that our clients have the best possible experience. We hope this tutorial helps you feel more comfortable with chart of accounts in your QuickBooks Online account! Don't hesitate to reach out to us if you have more questions, we would be happy to help. Stay tuned for more QuickBooks Online Tutorials!
