Contents
- Smart Connect overview
- Supported financial institutions
- Bank connection best practices
- Connecting a bank or credit card in Smart Connect
- Requesting a connection in Smart Connect
- Managing a Smart Connect connection
- Deleting a connection in Smart Connect
- Changing a Smart Connect account owner
- Smart Connect FAQs
Smart Connect overview
On the left side navigation click on “Smart Connect.”
You should see a screen similar to the following view:

Financial Institution cards
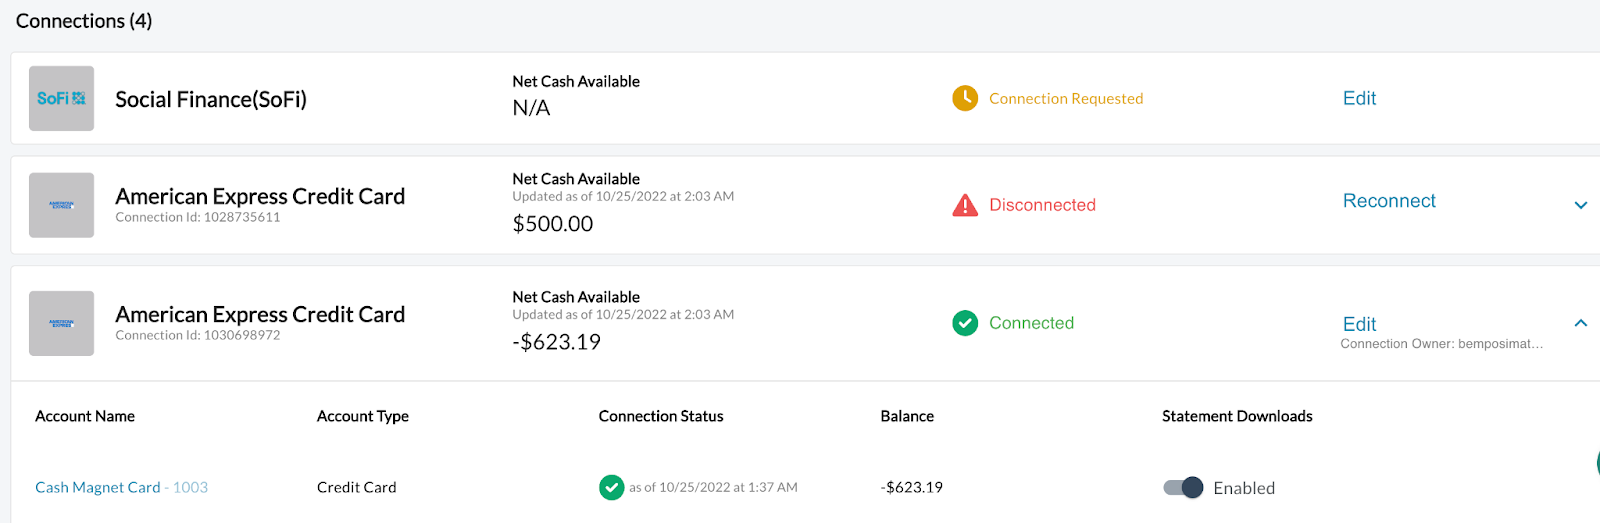
Financial institution cards provide account details such as balance and account type. For connected or disconnected institutions, click on the connection to expand the card.
Each institution will have its own card. You can click on the cards to expand them. An institution with a pending connection request will not expand since there are no account details to show until the connection is set up.
Aggregate cards
The Aggregate Cards summarize Cash Available, Credit Used, and Net Cash across all of the connected accounts.

Banner types
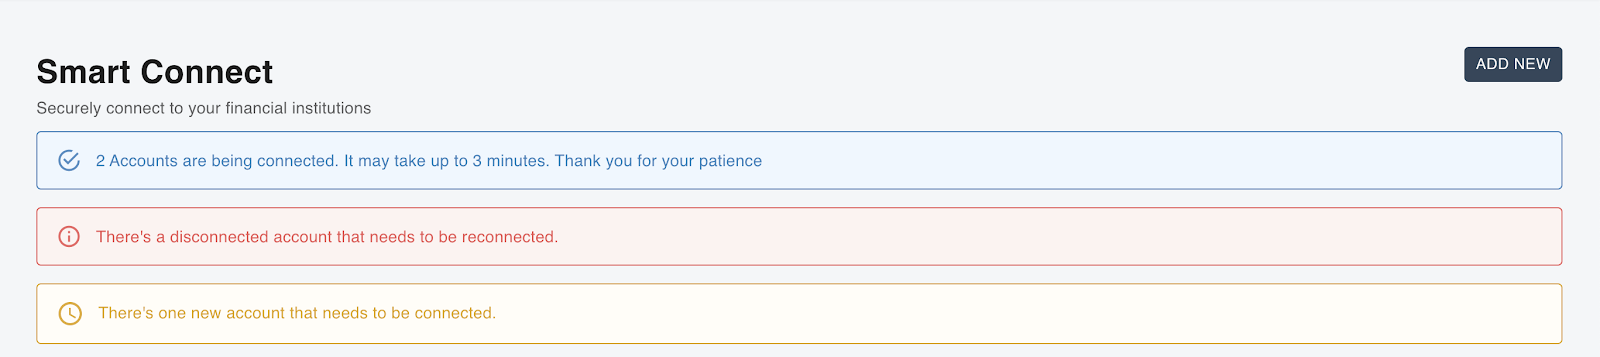
Blue Banner: The Blue Banner identifies new connections that require time to complete setup. When a blue banner appears, our system is pulling in data for your newly established connection, including balances and transaction details. Once setup is complete, the banner will be removed.
Red Banner: The Red Banner identifies current connections that have become disconnected. When in a disconnected state, the account owner will have to reconnect using their credentials. Once the account is reconnected, the red banner will be removed.
Yellow Banner: The Yellow Banner is shown when a user requests a new connection. This connection has not been established, and the account owner will have to connect their account for the first time. When the account is successfully connected, the yellow banner will be removed.
Supported financial institutions
We work with Mastercard Data Connect, which supports over 16,000 institutions. To confirm whether your institution is supported, visit THIS PAGE and search for your institution’s name in the search bar.

Note: if you see a green checkmark under Transaction AGG it means it can be connected and we can use AutoPush. If you see a green checkmark under Statement AGG it means we can also download statements.
Bank connection best practices
For best practice options relating to a handful of top institutions, click here. There are TWO elements to keep in mind:
1. Connection Type
Standard Connection:
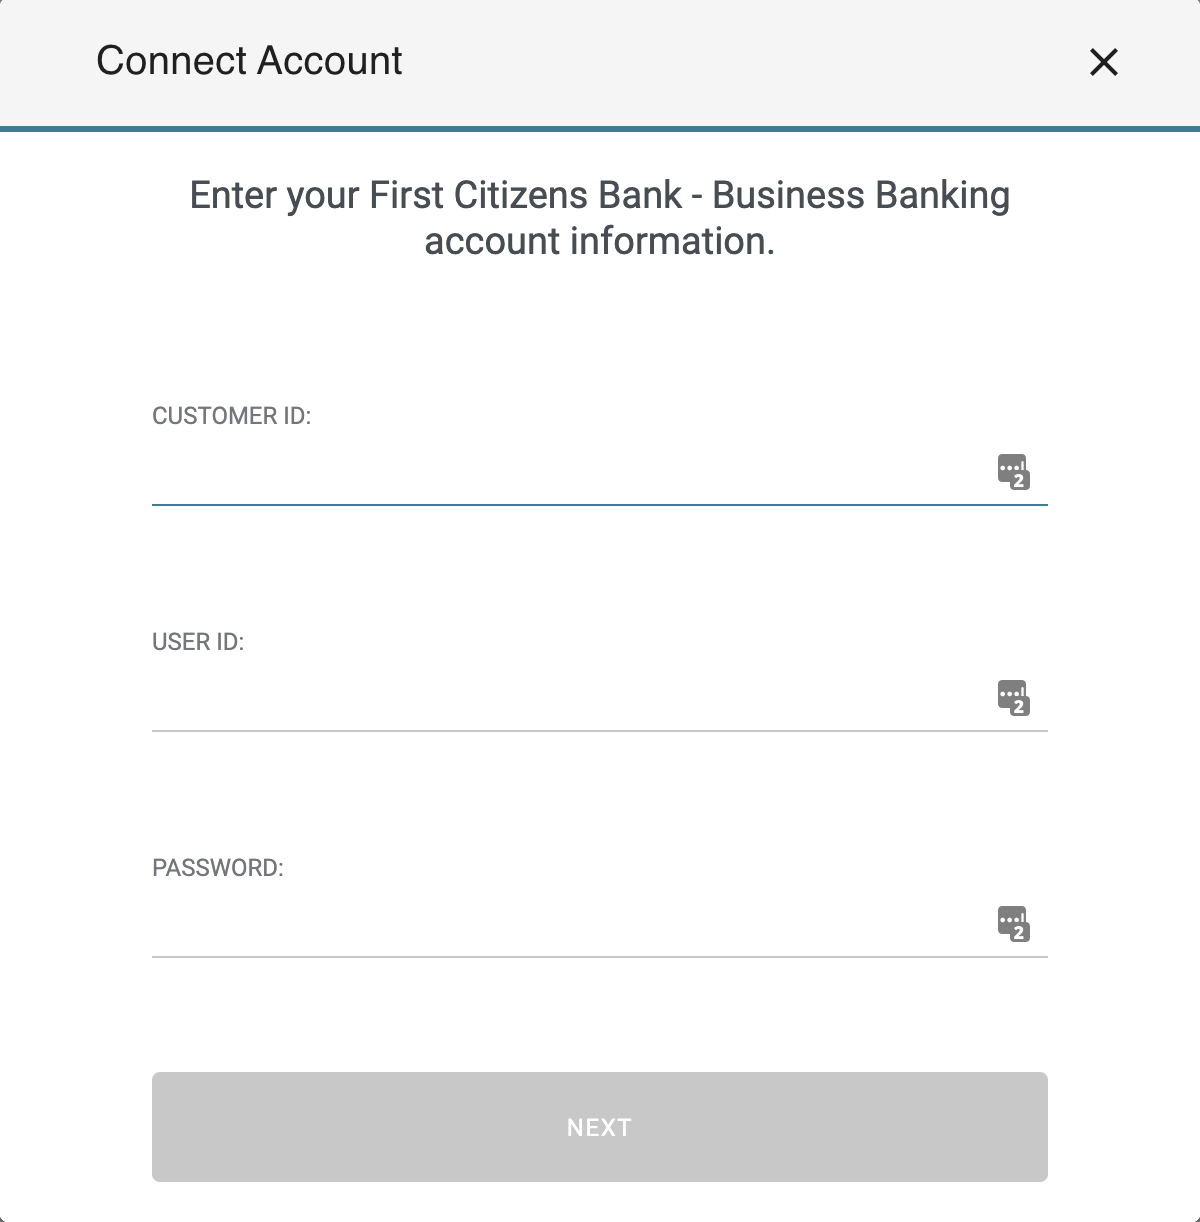
A standard connection requires a username and password to establish a connection. For some business accounts, you might need to provide a customer id in addition to username and password.
Enter the username and password.
Or you will be asked to enter the customer ID, username, and password.
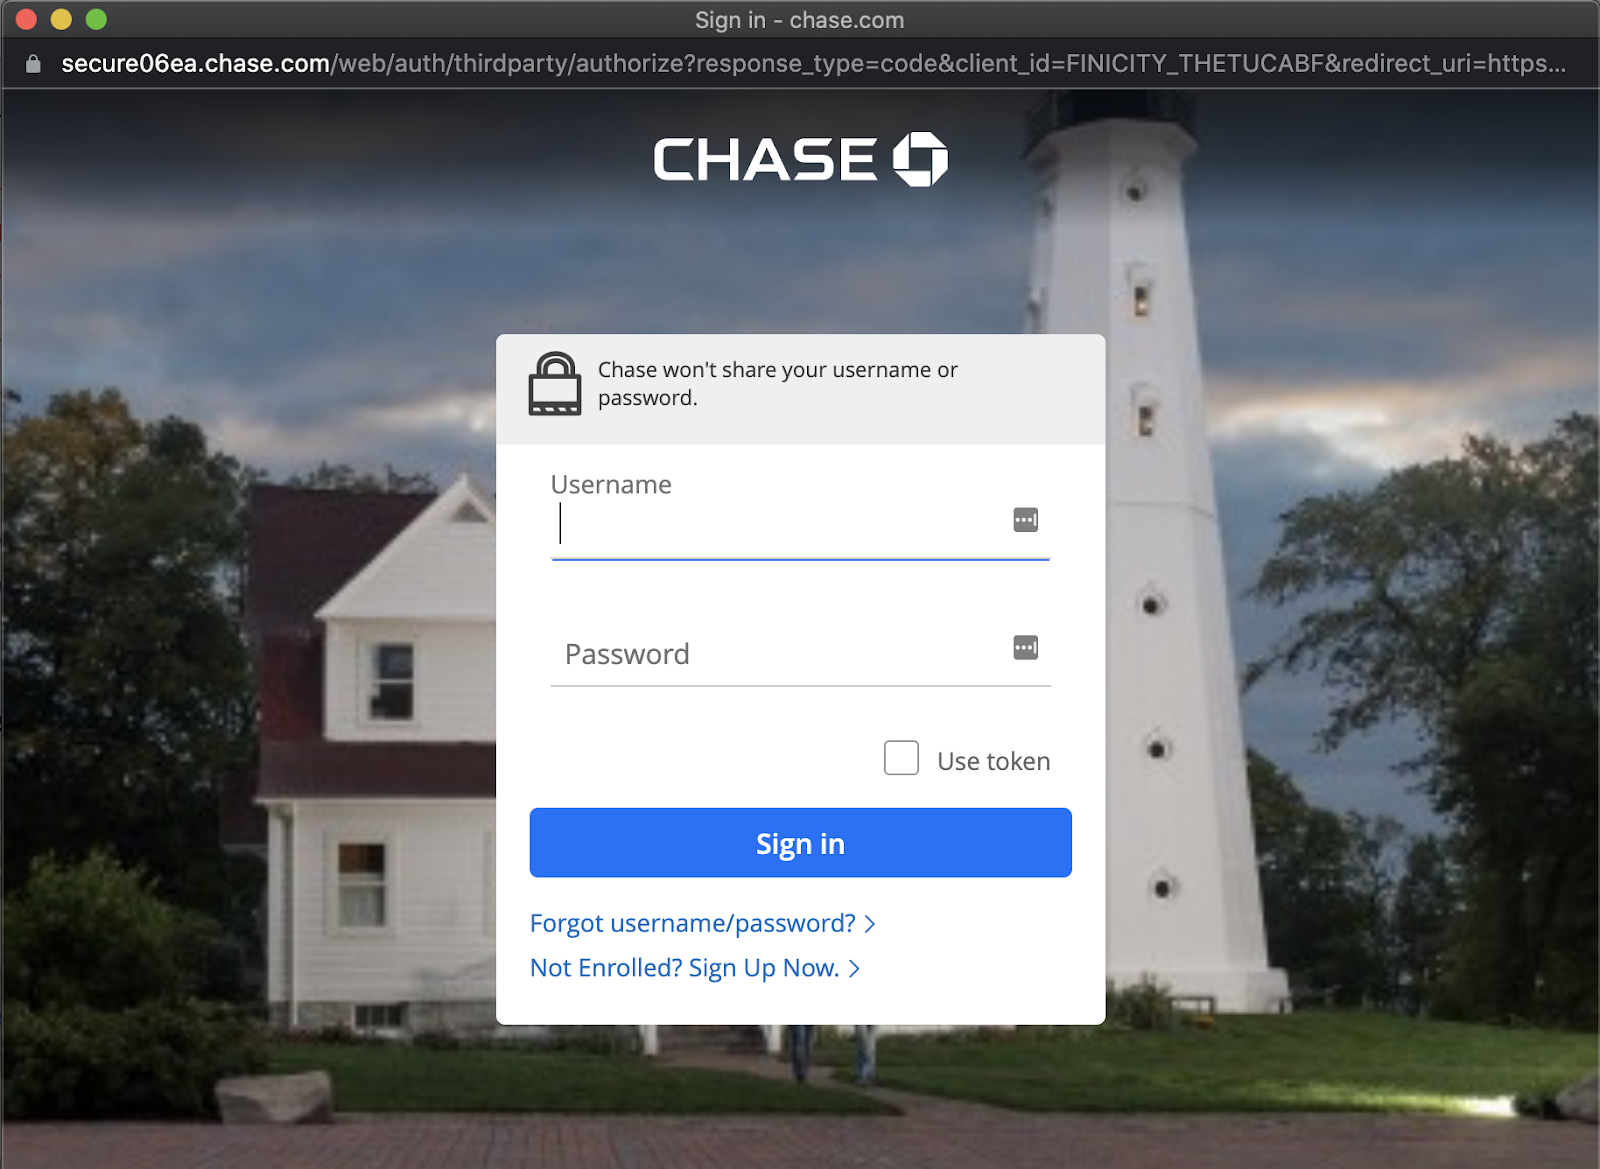
OAuth Connection:
An OAuth connection is similar to a standard connection where it requires a username and password to connect. However, OAuth connections use a token to establish the connection. It is becoming more common for institutions to require OAuth in order to gain data access. When you’re establishing an OAuth connection, it will appear as if you’re logging into the bank directly.
2. Credential Type
Banks and credit card providers generally offer TWO credential types:
- Primary: This provides full access to an account, with no restrictions.
- Read-Only: This gives access for a user ONLY to view account details.
A primary credential provides a more stable connection to the platform. Read-only will also provide access, but you might see disconnections more frequently than if you use primary credentials.
Additional Considerations
There are a few other things to consider before attempting a connection to the platform:
- Ensure your bank or credit card account institution allows third party connections.
- Understand that some institutions will not allow you to choose individual accounts to connect under your credentials; you might need to authorize ALL the accounts under those credentials per the institution's practices.
- Some institutions require a PIN (Personal Identification Number) to be able to connect to the institution; this is typically set up in the Security section of your account settings with the institution.
- Some institutions have additional considerations. If you experience issues, you might wish to reach out to the institution to inquire about their practices for connecting to third parties.
Major Institutions with Specific Setup Suggestions
General
- Regardless of whether an institution allows you to connect with read only credentials, we always recommend using client’s primary credentials.
- We recommend using Smart Link for a secure and easy way for clients to connect without sharing credentials or needing to be an active user of your platform.
- You can gather the credentials from your client(s) to make the connection directly within Smart Connect.
Chase
- Use your client’s primary credentials
- You can either:
- Use Smart Link to have your client make the connection (best practice); or
- You can either:
-
-
- Gather your client’s credentials to make the connection directly within Smart Connect
-
- You can use read-only credentials provided to you by your client, noting the following setting needs to be turned on within the user's financial institution settings:
-
- The third party app access checkbox needs to be checked.
- Here is a link that will walk you through: Access & Security Manager for Chase Accounts
Bank of America
These connections require a client’s primary credentials. You can either:
- Use Smart Link to have your client make the connection (best practice); or
- Gather your client’s credentials to make the connection directly within Smart Connect
Capital One
These connections require a client’s primary credentials. You can either:
- Use Smart Link to have your client make the connection (best practice); or
- Gather your client’s credentials to make the connection directly within Smart Connect
Wells Fargo
You can either:
- Use Smart Link to have your client make the connection (best practice); or
- Gather your client’s credentials to make the connection directly within Smart Connect
OR - You can use the Guest User making sure this user has permissions to allow third party data sharing; see the steps below to get this set up:
- Go to the Wells Fargo website and navigate to Account Access Manager.
- Sign in to your account.
- Click the Guest User option.
- Create a username and password for the guest user.
- Select the type of access you want to provide for the guest user.
- Share the username and password with the guest user.
- Guest users can
- Check your account balance.
- Download transaction history.
- View and request copies of checks and statements.
- Access other account information.
- You can manage guest users by
- Navigating to to Security & Support > Account Access Manager
- Selecting the Guest Users tab, which will allow you to make the following changes to your Guest User:
- View,
- Add
- Edit
- Delete access
We recommend users take advantage of GL Automation for the following institutions:
- Central Pacific
- Mecury
- Relay
Known Issues
American Express:
Some users experience issues connecting any third party platforms (such as QuickBooks Online, Bill.com, or Botkeeper) to American Express accounts. We suggest you reach out to American Express directly for technical support if you experience this issue.
It's important to note that even if your account disconnects, Botkeeper will intake and categorize any transactions that occurred during the disconnect retroactively; nothing will get missed.
If your client's books are updated weekly or monthly, there is no need to reconnect daily.
- It's best to reconnect the account 48 hours before you review the books to ensure the transactions through that date are downloaded and processed.
If your client's books are updated daily, you may need to reconnect daily until American Express is able to address the issue. Again, we suggest you reach out to American Express directly to request assistance.
Chase:
Users with more than one account under their login credentials might not be able specify which accounts they want to provide access to. We suggest you reach out to Chase directly for assistance in configuring your account(s).
Connecting a bank or credit card in Smart Connect
⚠️If you are using AutoPush: You’ll need to turn off the bank connection in QuickBooks Online to avoid duplicate transactions being created in the G/L. AutoPush allows Botkeeper to only need one bank connection in SmartConnect in order to gain access to transactions and statements.
- Click the green “Add New” button in the top right corner.
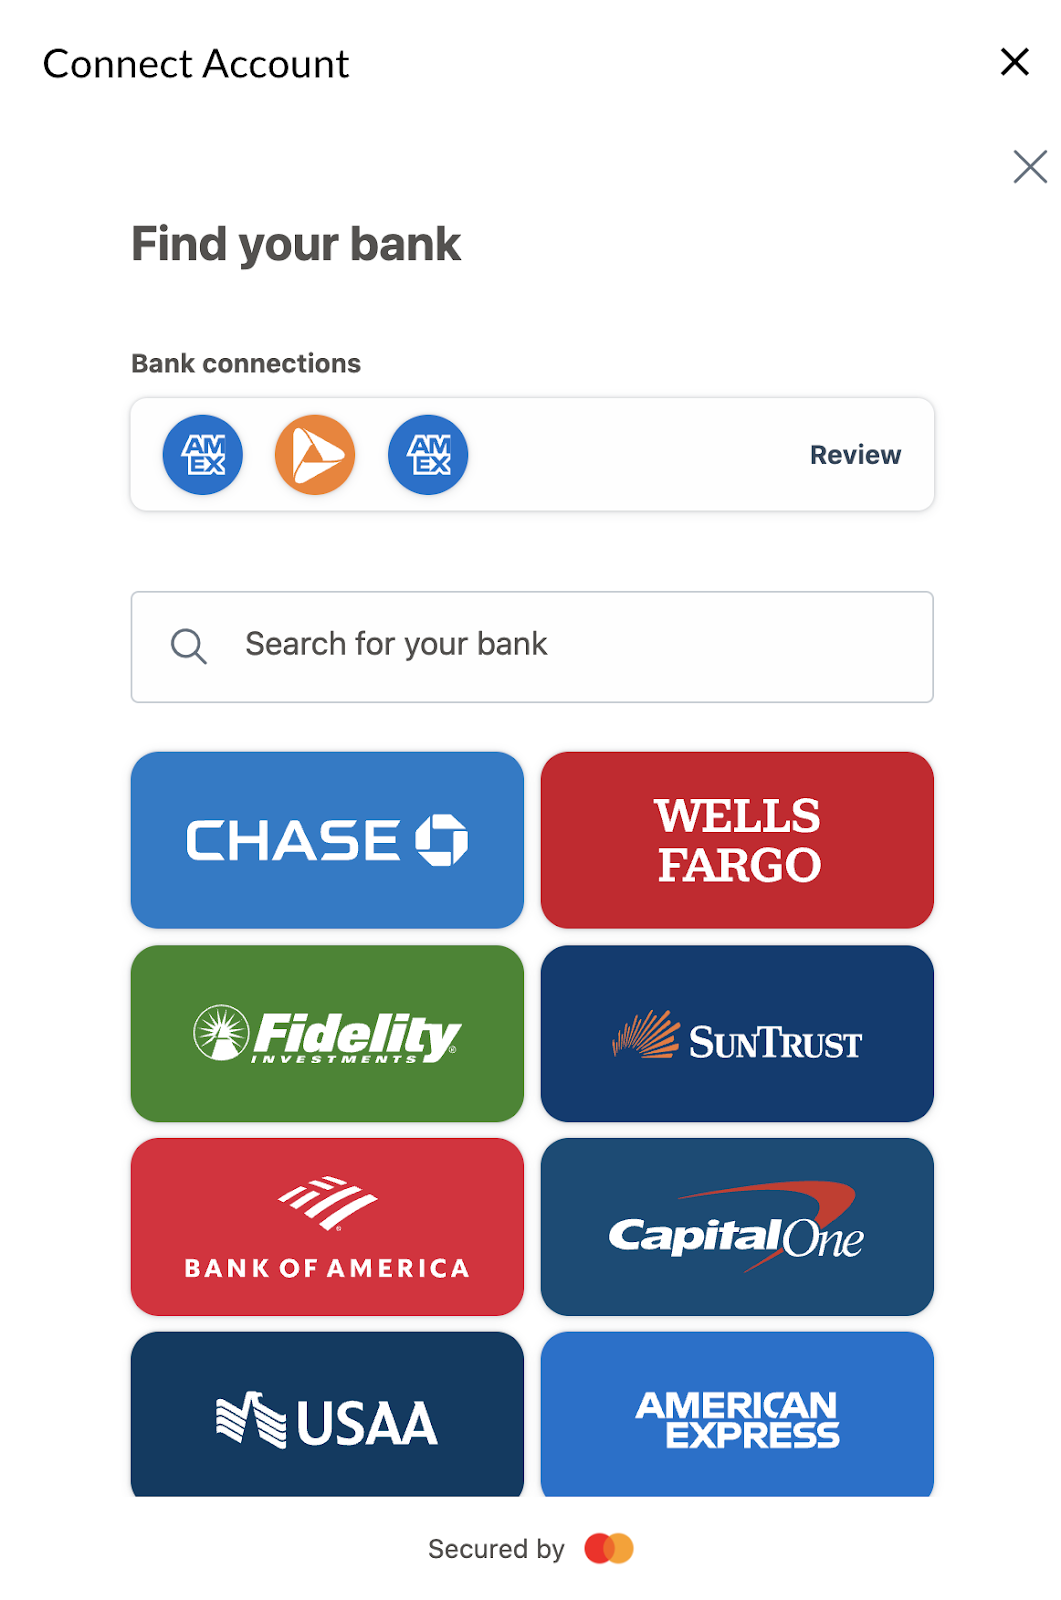
- A connection popup screen will appear. If this is your first connection, accept the terms and conditions and click the “Continue” button. If you established a previous connection, the “Find Your Bank” screen will appear. You can now search for your financial institution or select from the popular institutions below. the search field:
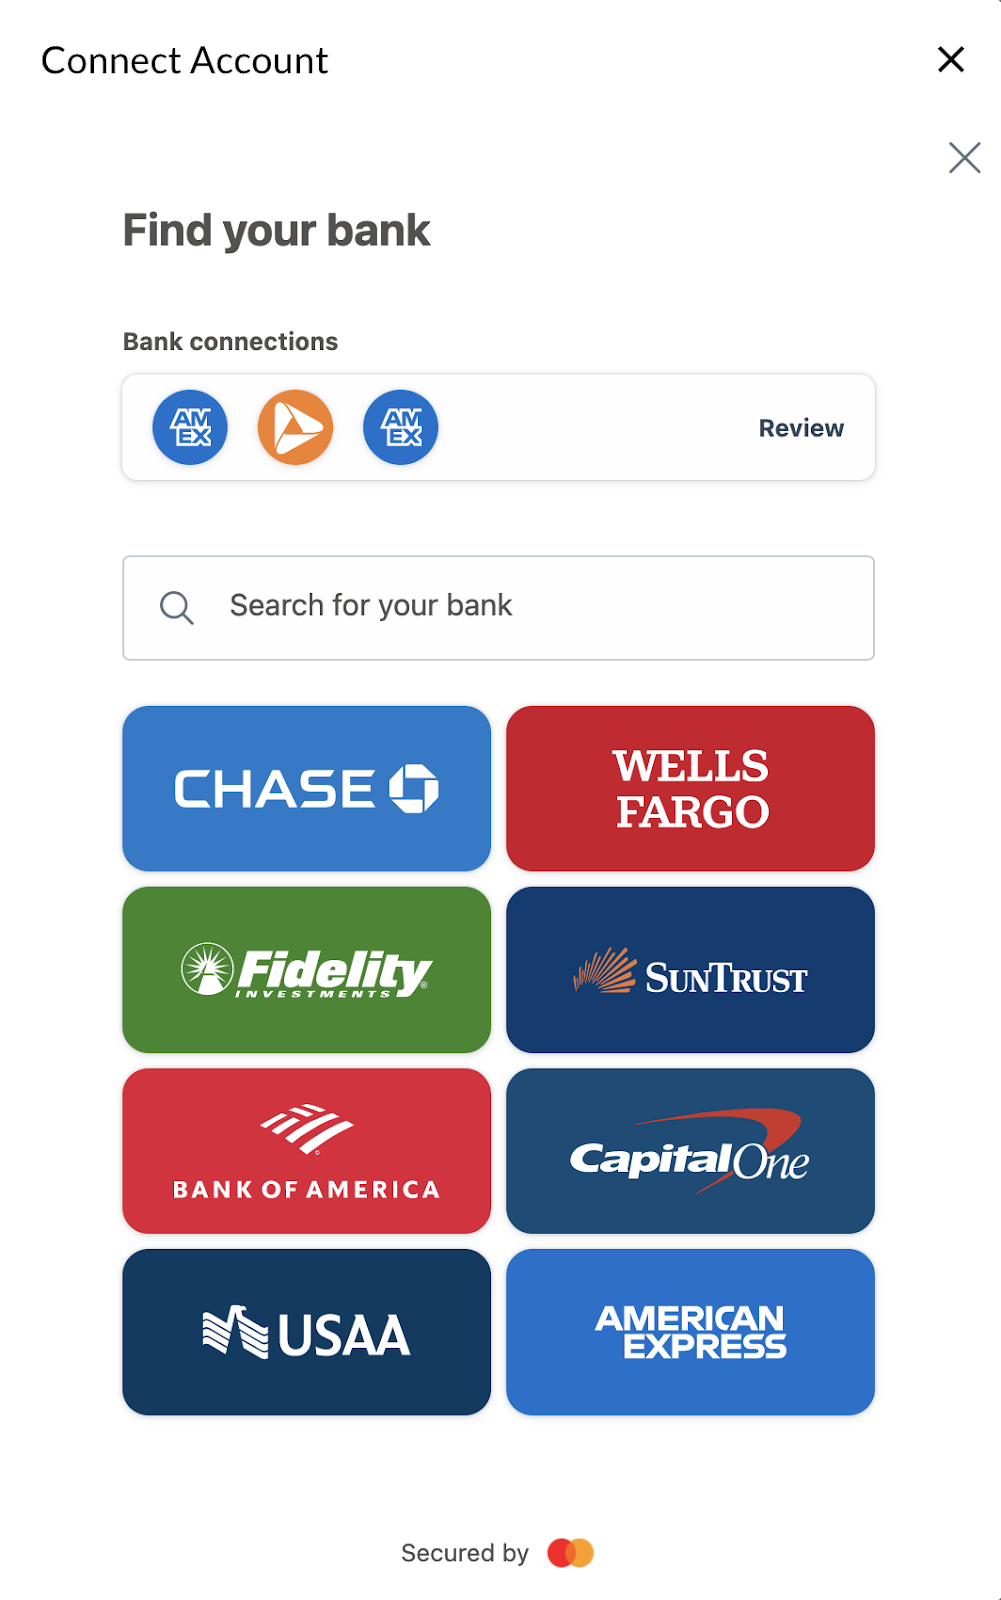
- Select the bank or credit card vendor and click the “Continue” button.
- Enter your user name and password and click the “Sign-In” button. This will begin the process of gathering your account details.

- From the options that appear, select the accounts you want to connect.


- Once you’ve selected your accounts, click the “Save” button.
- The final step is to review your connections and click the “Submit accounts” button.

- Once you click “submit,” you’ll get a success message stating Accounts Received. You'll now see the linking accounts modal.
- Link Smart Connect account to GL. Connect the client’s Smart Connect account directly to their general ledger.
NOTE: Without this linking, multiple pieces of functionality, including AutoPush, will not be available.

If your client clicks the Add Account button, or if you are requesting via a task for them to add the connection, it is the Partner’s responsibility to link the Smart Connect account to the GL account. Your client will not be able to complete this linking.
If you ever want to review the linking or change it, you can find this information within the connections table. Click into the institution card to get details, and expose the GL Account column. Click the drop-down to edit the link.
Requesting a connection in Smart Connect
If you do not have the credentials and another user at your firm or one of your clients needs to set up the connection, you can request the connection from them.
- Click the “Request Connection” button
- Next, search for the institution in the “Institution Name” field and select it from the list.

- Next, search for the user that is responsible for setting up the connection in the “Assignee” field and select them from the list.

- Click Create Request and the connection request will be sent. You will see the requested connection in the list of connections.
Using Smart Link when requesting a connection
Smart Link enables non-Botkeeper users to set up Smart Connect connections without needing to log in to the platform. Smart Link allows users to request these credentials in two ways: by sending a secure, white-labeled (firm branded) email to the account POC, or by generating a shareable link they can send to the account POC in another way of their choosing.
Upon requesting a connection in Smart Connect, you'll see an option to add a Smart Link as seen below. You can choose to send the link to the account POC via email, or generate a shareable link to give to them via your own custom email, text or another way of your choosing:

Generating a SmartLink will auto-create a task for the account POC to connect the account:

Once the point of contact (POC) clicks on the link from the email OR the shareable link for the first time, they will be prompted to authenticate their email.

If the box shown below is checked, this authentication will last 90 days, after which point the account POC will be asked to authenticate again, lasting another 90 days.

After clicking "Verify Email," the POC will be emailed a code to enter:

The account POC will copy and paste this code into the smart link url window they already have open:

The account POC will be presented with a connection widget identical to what’s displayed when a Botkeeper user adds a new account, requiring them to locate the financial institution, then enter their credentials to connect the account.

After clicking "Next," the POC will then type in the institution name to search for and select.

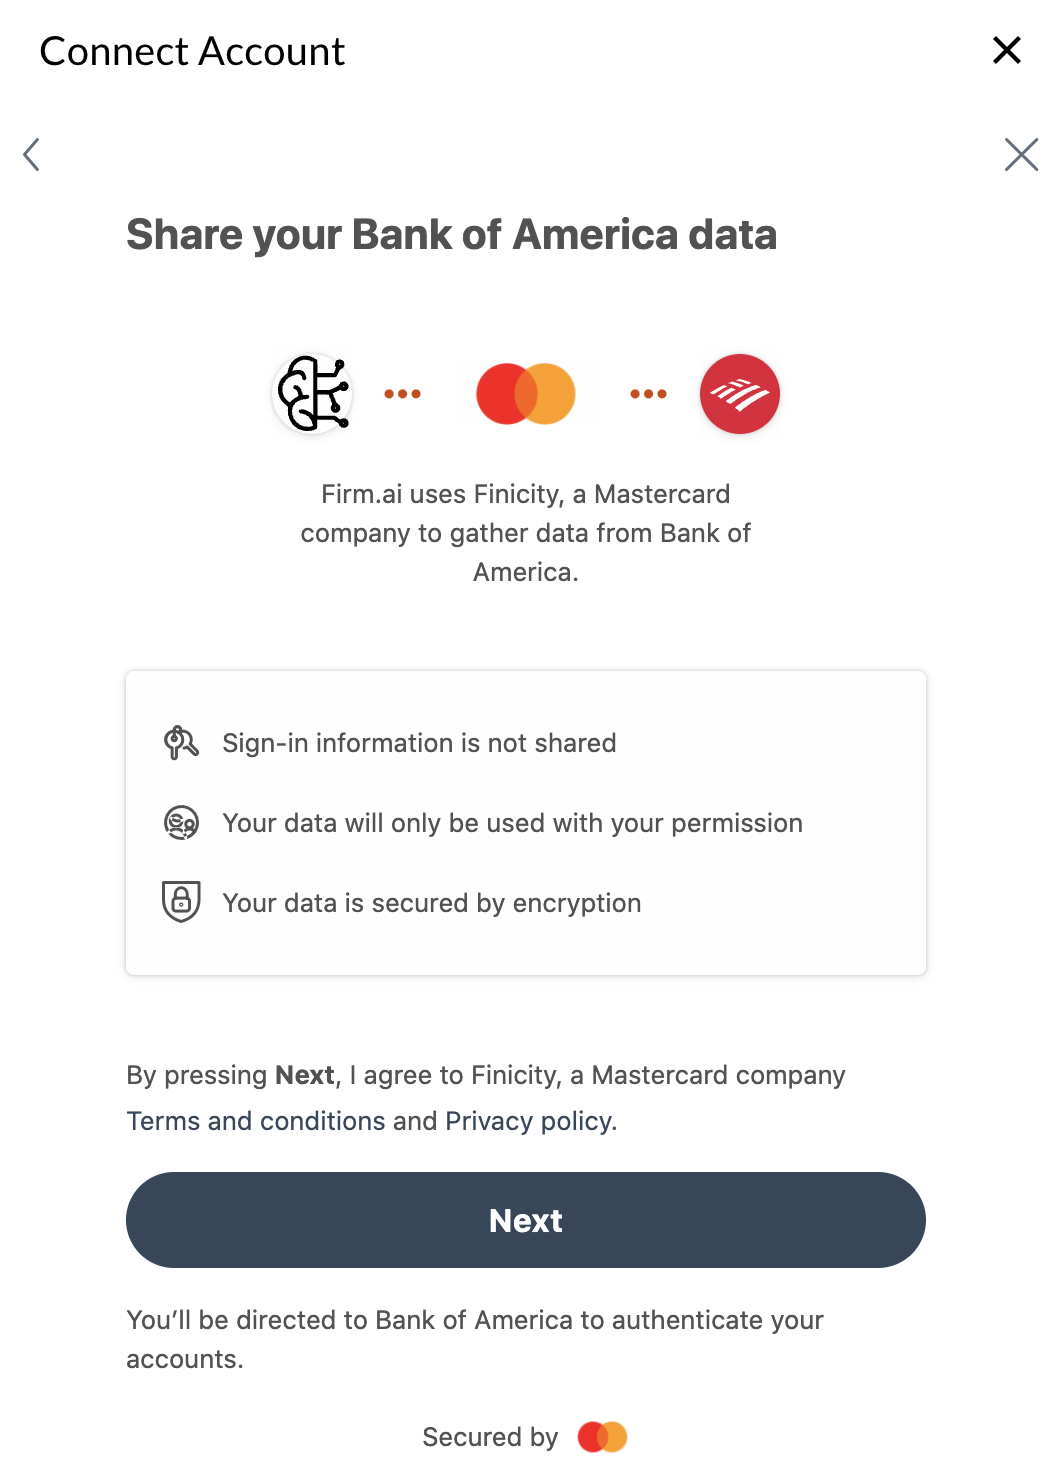
After selecting the correct institution from the list, the user will be presented with a screen that looks like the below. They will click “Next” to proceed to the institution’s window or tab. When the new window or tab, dependent on the financial institution, launches the account POC can complete their credential entry.

After the connection is established, the auto-generated task completes without any additional input.
Note:
- Smart Links, once created, are valid for 7 days. New links cannot be created until the 7th day has been reached, causing the original link to expire
- If a task is assigned for a Financial Institution Connection Request, it should not be marked completed manually. The task will autocomplete once the account is reconnected by the account owner. The account owner is listed in the last column of the account table in the Smart Connect module.
- You can see the Smart Link option in the following locations of the portal:
- Smart Connect module - by selecting the Request Connection button, the option to generate a Smart Link will be in the resulting pop-up window
- Work module - by selecting the Create New Task button, the option to generate a Smart Link will be in the resulting pop-up window
-
Work module - by selecting a Connect [financial institution name] task, the option to generate a Smart Link will be in the Details section of the resulting pop-up task window
Managing a Smart Connect connection
If you’ve established a Financial Institution/bank/credit card connection, you can manage this connection and the visibility of accounts within the connection modal.
- Click the green “Add New” button.
- Next, Click the “Review” button under the Connections.
- From the “Review your accounts” page you can either select “Add another bank” or select a previously connected account.

- To manage/update an existing connected institution,
- Click on one of the listed institutions
- The popup window will update with a listing of your accounts.
- You may or may not be able to select/deselect which accounts you would like to provide your accountant access to.
- If your institution doesn’t allow you to select or deselect an individual account, it may be due to the use of Oauth access .
- To confirm if your client’s financial institution uses Oauth access click this link and search for your institution name.
- Please note, financial institutions listed in the spreadsheet use Oauth access, and therefore will not allow you to select individual accounts to share with your accountant; all accounts will be given access to your accountant.
- To take advantage of the efficiencies of Smart Connect you will be required to move forward by connecting all the accounts.
- If a task is created to reconnect a bank that is not part of the scope, you can make a comment on the task to let your accountant know it is not in scope. You can then reject the task.
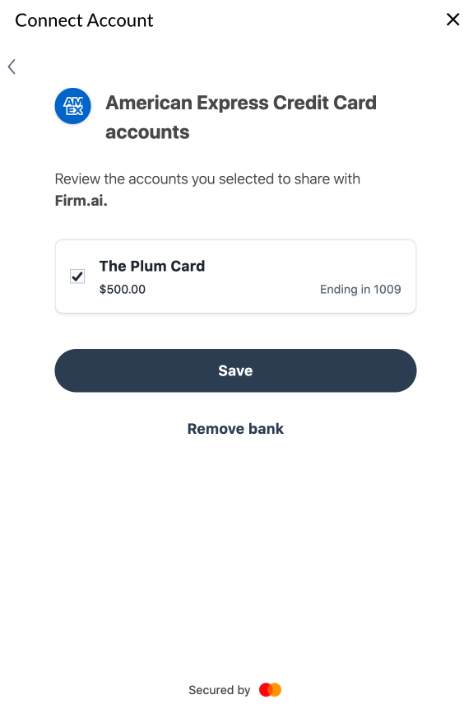
- In the “Update accounts” view, you can select/deselect accounts or remove the Financial Institution connection entirely.
- Once you select/deselect an account, click the “Save” button to save your changes.
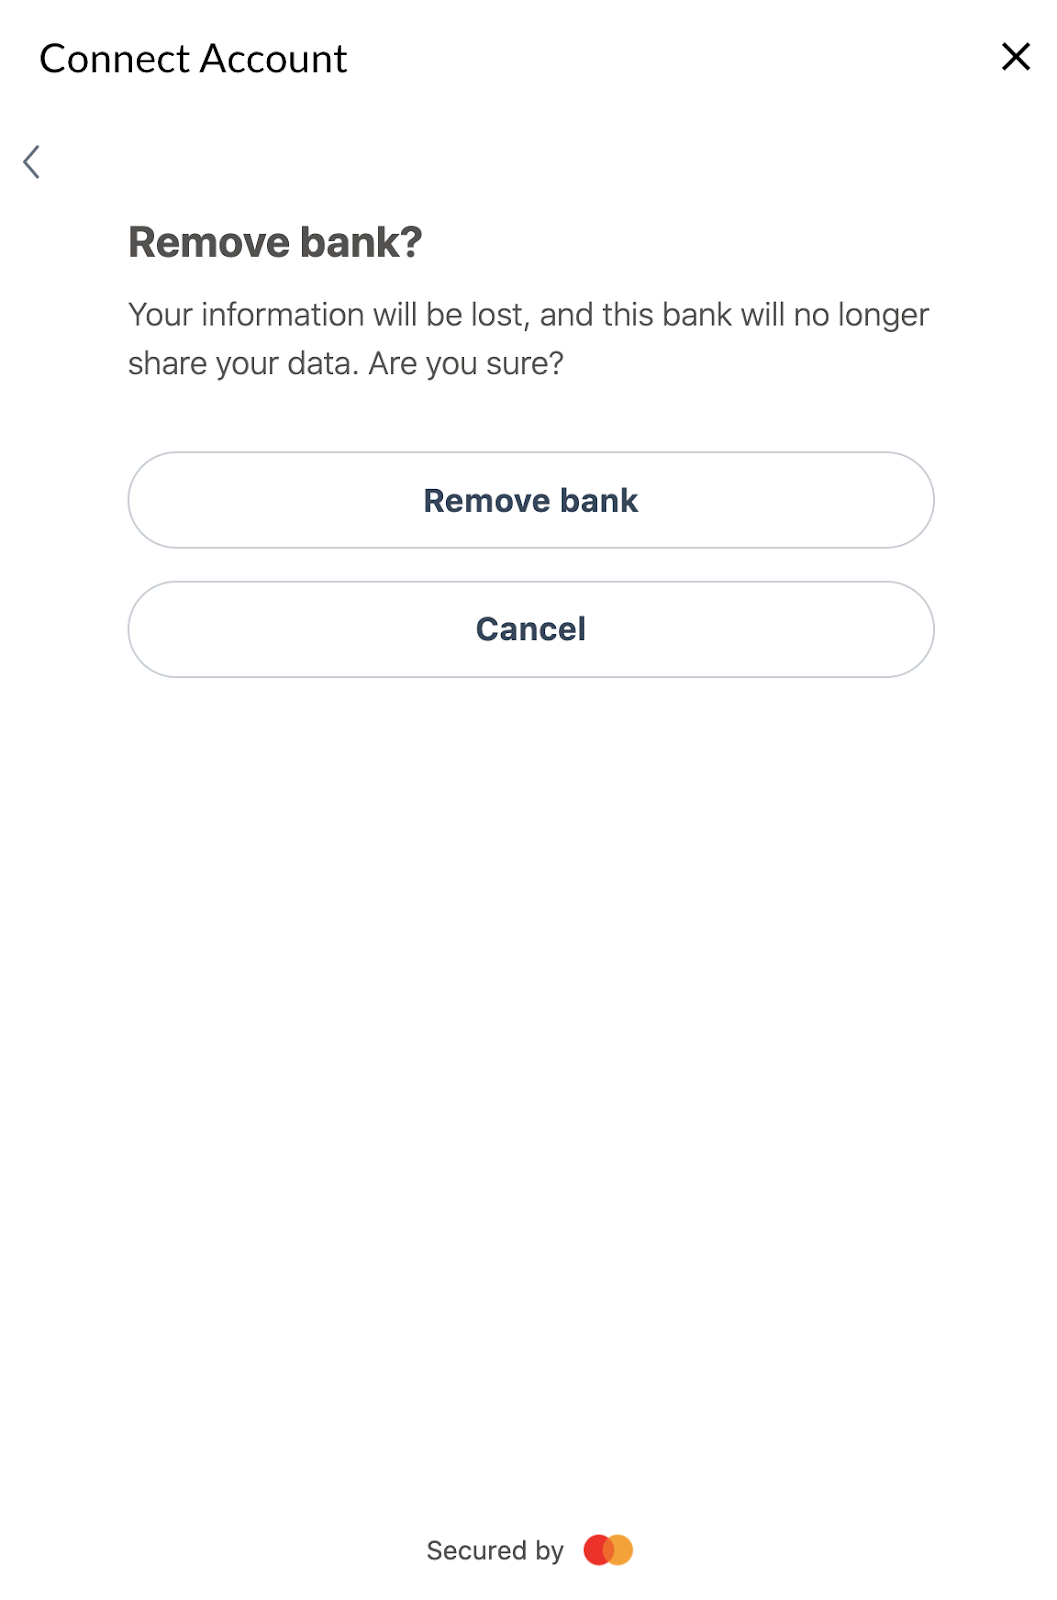
- If you want to remove the Financial Institution connection, click on the “Remove bank” button.
Deleting a connection in Smart Connect
Visit the account overview page, and click the Edit or Reconnect button (depending on the current state of the connection), then select Delete Connection.

The account owner who established the connection and users with the role Partner Admin are the only users who can delete/remove a connection. This can be accomplished on the account overview page by clicking the Edit or Reconnect button (depending on the current state of the connection), then selecting Delete Connection.
Changing a Smart Connect account owner
View this brief interactive demo to learn how to change a Smart Connect account owner.
Smart Connect FAQs
What do I need to do when I get the message "Disconnected—user action required" for an account in Smart Connect?
When an account becomes disconnected in Smart Connect you may be assigned a task to reconnect the account. You can follow the instructions shared in the task to make the reconnection. However, you may be in Smart Connect before seeing the assigned task, therefore you may be inclined to reconnect the account directly from Smart Connect. To reconnect an account directly in Smart Connect take the following steps:
- Hover over the words Disconnected - User Action Required - a tooltip will appear to let you know what action needs to be taken to reconnect the account
- Take the action shared in the tooltip
- For additional assistance, you can reference this link
- Find your error message in the Connect Message column of the User Action Aggregation Status Codes Table
- Review the Error Description to determine what may have caused the error that triggered the disconnection
- For additional assistance, you can reference this link
Once the account has been reconnected, the disconnected task assignment will be automatically removed from your task assignments.
For any disconnected account in Transaction Manager, the “Account Details” will also inform users if the account has become disconnected.
Your Smart Connect may have a few “Connection Requested” cards waiting for you. Click the “Connect” button on each card to begin the connection process.
- Your Smart Connect may have a few “Connection Requested” cards waiting for you. Click the “Connect” button on each card to begin the connection process.
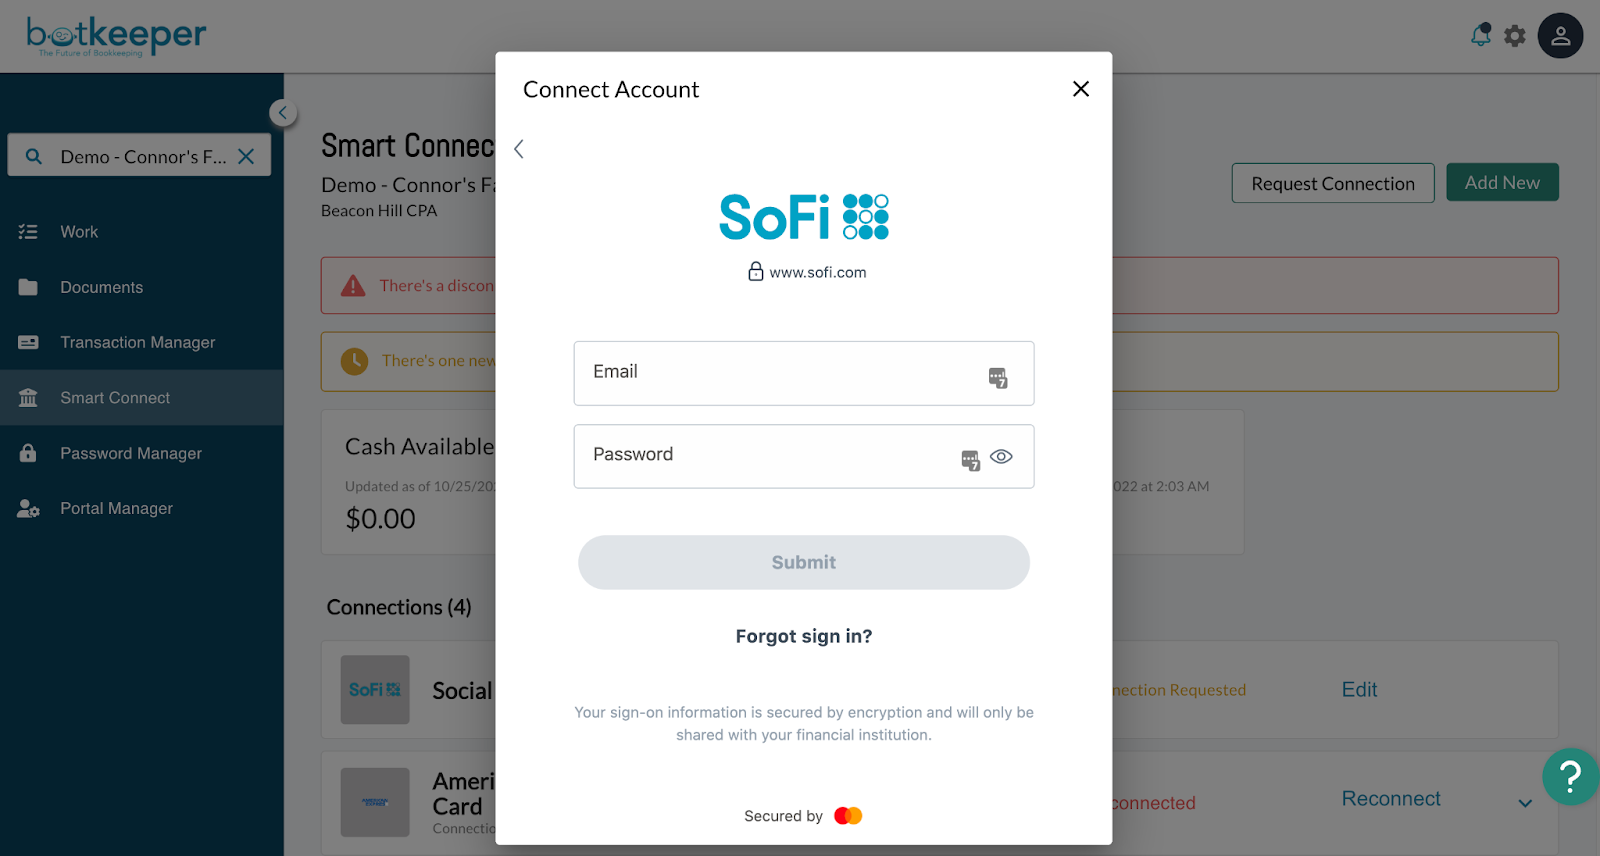
- Once you’ve clicked “Connect,” a connection popup will appear.
- Review the terms and conditions and click the “Next” button to accept:
- Enter your username and password and then click the “Sign-in” button.

Note: It may take up to 10 minutes for the connection to establish and for data to appear on the page. Wait at least a few minutes before refreshing your browser.
Where can I find transactions and statements for an account in Smart Connect?
Expand a financial institution card and click on the account name. Transactions will be listed in the account details, and available statements will be shown.
To review transactions for an account, expand a financial institution card and click on the account name. Transactions will be listed in the account details.

You can use the search bar to find transactions using any details available within the table. Here, we searched for a transaction by amount:

You can also filter transactions by date as shown in the dropdown here:
The default view for transactions is "Last 30 Days."
Force refresh of transactions
Click the “Refresh Transactions” button on the Account Details page above the transaction feed if you notice the feed hasn’t refreshed. The system refreshes the feed at 5 a.m. ET daily by default.

Locating Statements
To review statements for an account, expand a financial institution card and click on the account name. Bank Statements will be listed above the account details. Note that the expected availability date of your next statement will be shown in parenthesis next to the "Bank Statements" title (see illustration below).
Forcing the Most Recent Statement to Download
If the most recent statement isn’t in Smart Connect, users may now click a “Refresh Statements” button that will attempt to download the most recent statement (if available). Users may only click the button once per account, per month (see illustration below) afterwards, the button will gray out. Hovering over the grayed-out button will reveal the next available date the button will be available.
Please note: the system will try to download your statement one more time if the first attempt fails; this second attempt occurs 2 days after the first try. It's best to allow the system to make both attempts before trying to force a download.
If the next statement date has not yet occurred, clicking the refresh button will attempt to download the current month's statement, and not for a future date. Effectively, you will use your one opportunity to attempt to force a download.

Reporting of errors downloading a statement
When the system encounters an error downloading a statement, a red banner will display on the Account Details page of the Bank Statements section. The banner will disclose the error and the time of the next scheduled attempt to download the statement:

Please note: if your account has been disconnected, the banner will indicate there has been an issue downloading the statement, but will not provide an expected date for the next download attempt.
How do I find more details for a financial institution in Smart Connect?
You can click the Account Name on an expanded financial institution card to navigate to the Account Details page.
When you click on the Financial Institution cards, you will see a list of accounts connected for that institution, their account type, connection status, current balance, whether statement downloads are enabled, and which day of each month the system will attempt to download a statement. You can click the Account Name to navigate to the Account Details page to access the transactions and statements for the account.

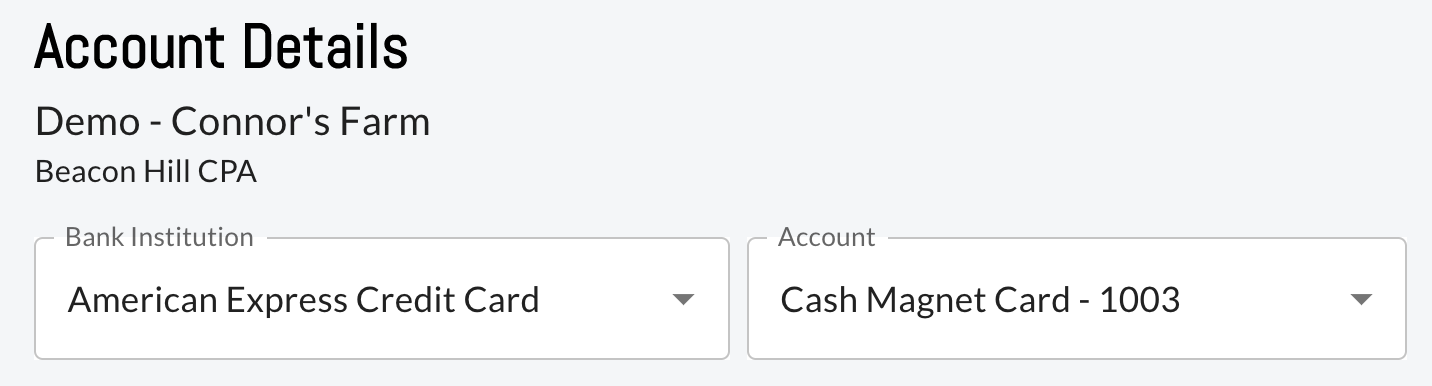
Your Account Details page will look similar to this:

From this page, you can use the “Bank Institution” and “Account” dropdowns to navigate to other accounts without needing to exit back to the main Smart Connect screen: