


A new client is added to QBO, and simultaneously that client is added to your marketing welcome campaign in Mailchimp.
It’s always a good idea to welcome new clients to your business in some personal manner. It makes them feel like they’re going to be treated well in their brand new relationship with you, and it helps answer any on-boarding questions before they arise.
But let’s be real: it can be time-consuming to manually send out these messages when your firm is growing everyday.
Likely, accounting firms are already sending out personalized notes and hopping on the phone with their new clients. But what about those nitty-gritty details that you need to communicate right away? Things like how to contact the right people at your firm, how to log into select dashboards, and general guidelines regarding what to expect from your new relationship.
Wouldn’t it be great to automatically enroll new clients into an email workflow that passes that information along without any effort from you?
It’s possible! You can set up an automated marketing strategy via email to welcome clients and give them the lay of the land. To ensure that no client is missed from this welcome program, we’ll show you how to add them to email delivery lists automatically using Zapier.
Let’s jump in!
Getting Started with Zapier & Mailchimp
To begin this automation, we need to get your ducks in a row. You’ll need a Zapier account and an email service provider. Mailchimp is a great place to start if you’re new to email marketing. The best part? Mailchimp is FREE to start. As of today, you can manage up to 2,000 email contacts for free with Mailchimp.
You can sign up for a Mailchimp account here: https://login.mailchimp.com/signup/.
You’ll also need a Zapier account. This software is something known as middleware—it’s responsible for creating the connections that enable different pieces of software to talk to each other.
Zapier is also free. You can sign up for an account here, or learn more about other cool Zapier integrations here.
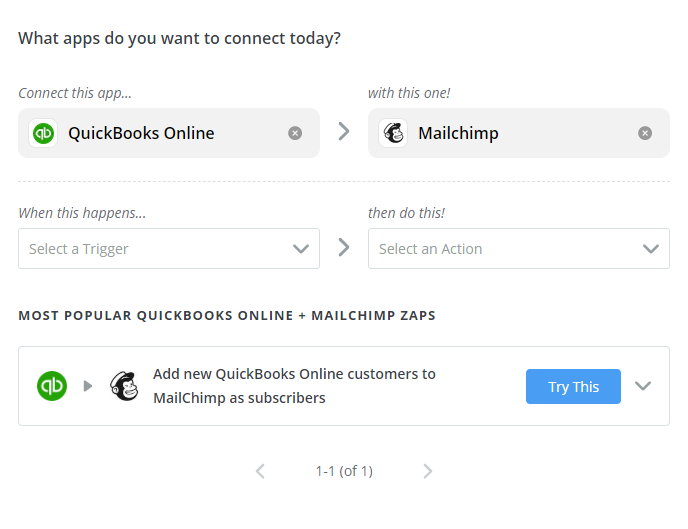
Step 1: Log In to Zapier & Select the Correct Template
To get this Zap (Zapier’s term for an automated task) started, let’s navigate over to Zapier and log in. Once you’re logged into your account, you can search in the, “What apps do you want to connect today?” dropdown menu for QuickBooks Online (QBO) and then Mailchimp. Once you have those selected, Zapier will suggest a Zap template for what we’re trying to do.
Let’s select, “Add new QuickBooks Online customers to Mailchimp as subscribers,” and then click, “Try This.”
Step 2: Connect QBO
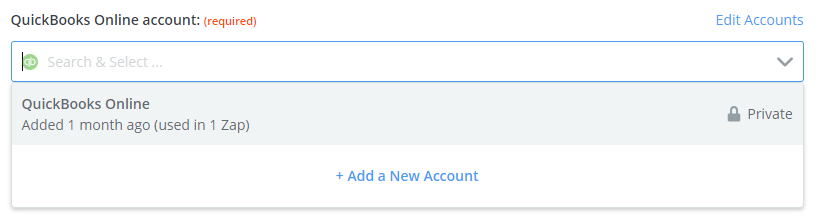
Next, you’ll select your QBO account from the dropdown menu:
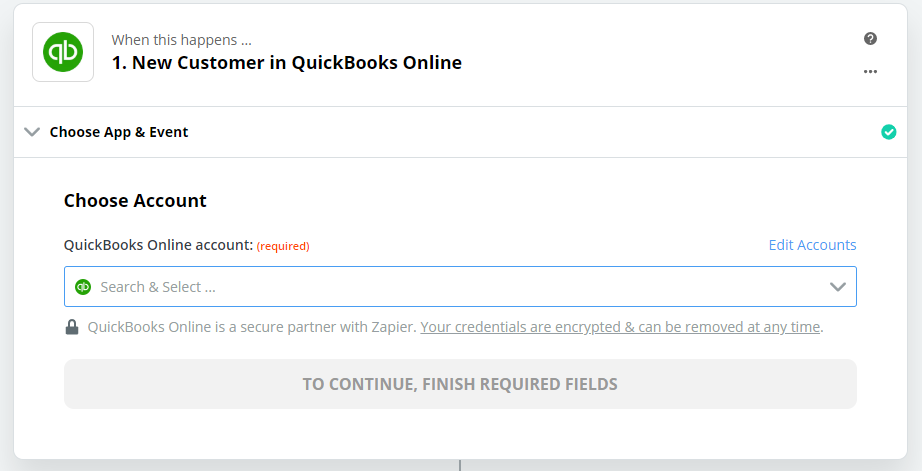
If you haven’t previously connected your account, you can do so now by clicking on the “Add a new account” option:
After you’ve selected the account, click “Continue,” and you’ll be ready to test the connection.
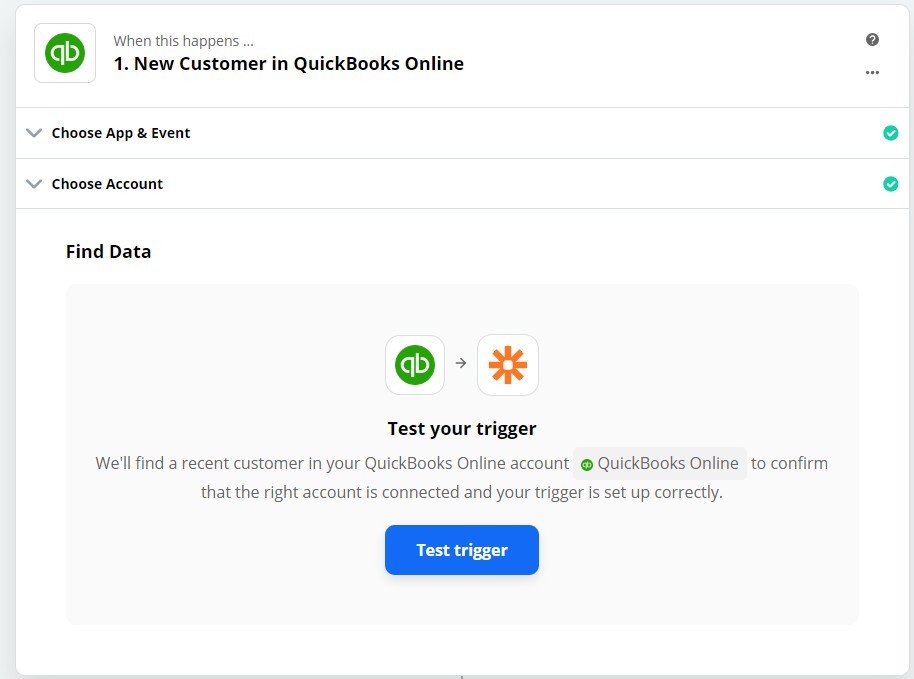
Step 3: Test Your QBO Connection
After clicking “Test trigger,” you’ll see a sample contact populated. This is most likely the most recently added contact to your QBO account.
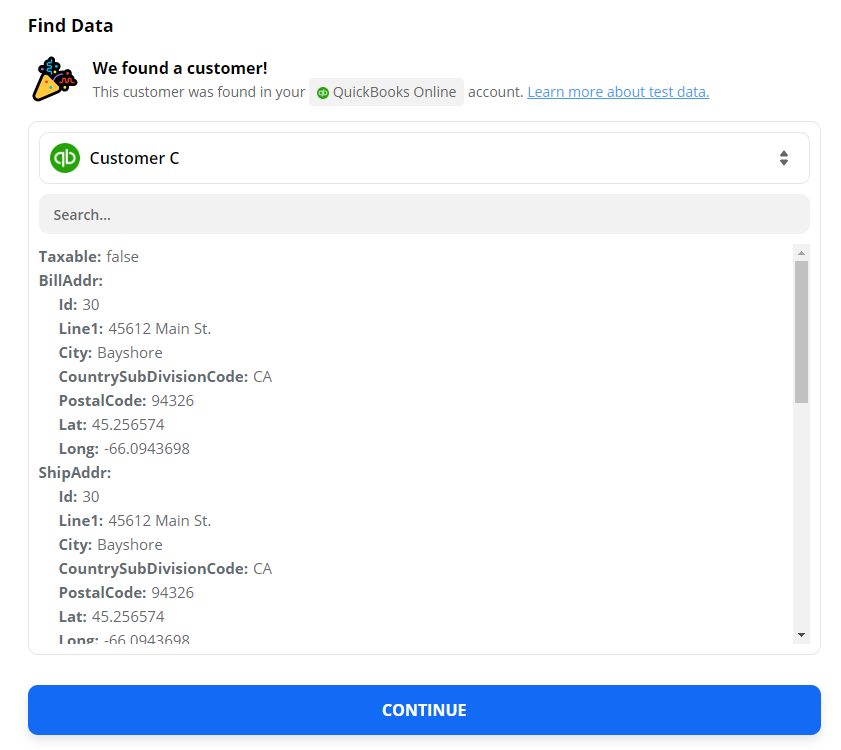
After you have a successful test, click “Continue” again. This will bring you to the Mailchimp setup screen in Zapier.

Step 4: Connect Mailchimp
Next, sign into your Mailchimp account, or select one you’ve already connected to Zapier.
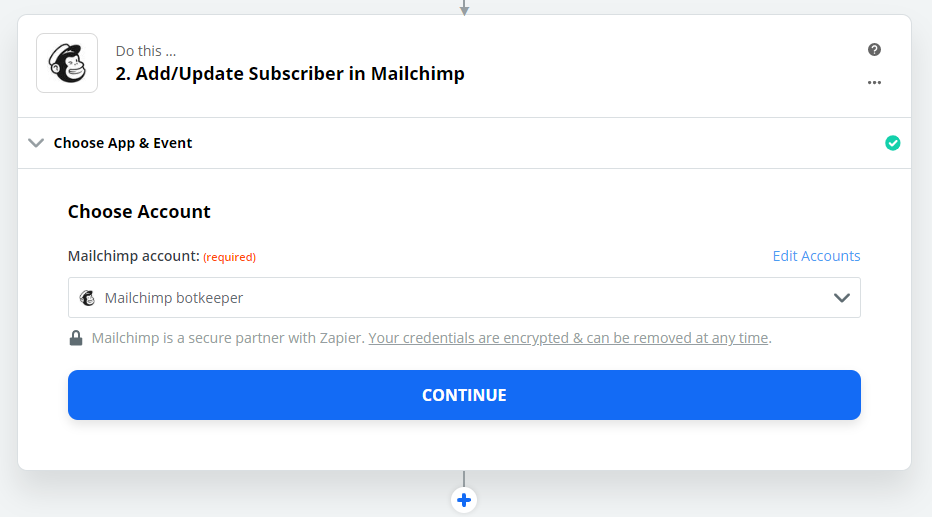
Now select “Continue” once again!
Step 5: Customize Your Options
You can now customize every Mailchimp contact that’s automatically added.
There are many options to select:
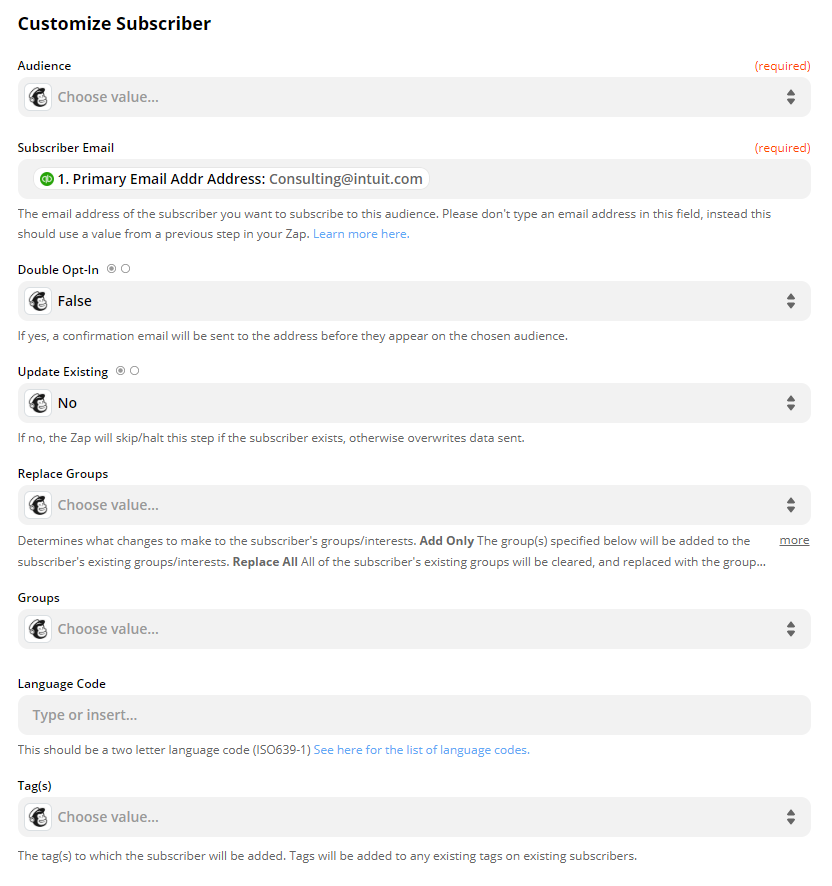
Choose your audience with intent.
Make sure you select the correct field for the email address, and specify whether you’d like them to be a “double opt-in,” which means they’ll receive a confirmation email before they’re added to the chosen audience.
The “Update Existing” option allows you to skip updating the contact in Mailchimp if the email address is already part of your audience.
After you’ve set up the required fields, you can then click “Continue.”
Next, let’s give all the options a review and double-check that the settings are right. When you’re ready to give it a try, turn on the Zap!
Final Notes & Hints
To test this Zap, you can go over to QBO and add a new customer. (Make sure you enter an email address!) Give the Zap a few minutes to fire, and then check for the new address in the specified audience. Another great place to reference when testing is the Zap history page. This allows you to see what Zaps fired when and the data associated with them. Also, you can see if they were successful or not—and address any possible error messages.
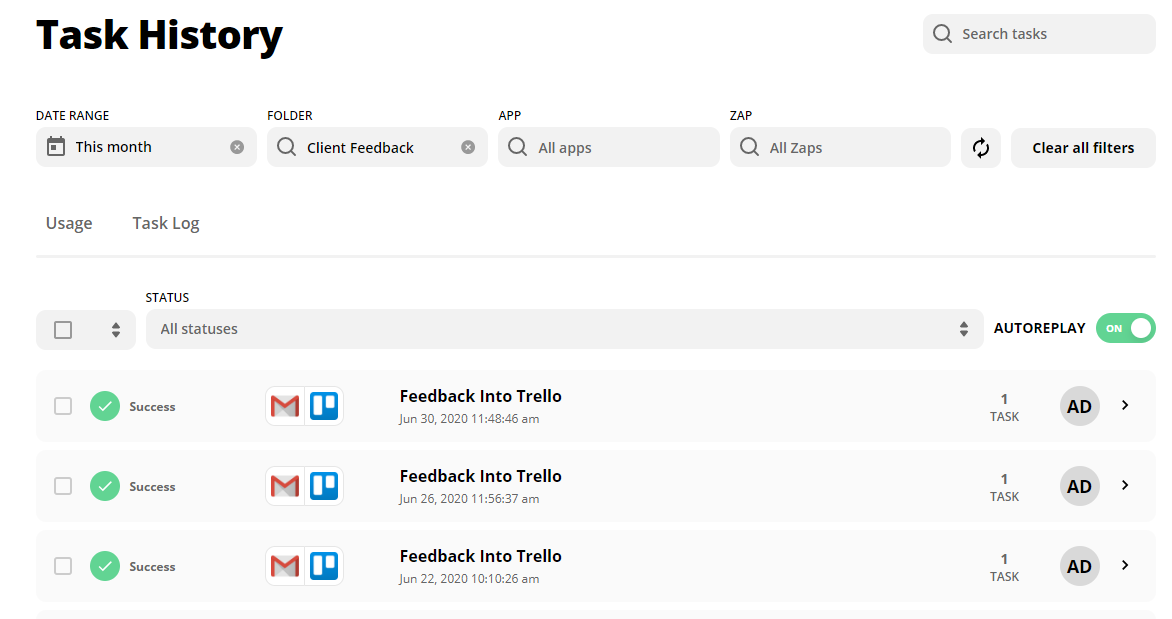
Here you can see some previously successful Zaps in your history. You can filter by date, folder, connected apps, Zap name, or status. It’s a good idea to peek in here every once and a while to make sure things are running smoothly. (You can set up a search to look for zaps that have stopped due to errors.)
Congratulations on your Zapier success! Automation isn’t that scary—and you’re becoming a real Zapier guru!
Stay tuned for more Zapier tutorials!
As a reminder, if you’re still struggling to set up this Zap or any others, there are some great resources on Stackoverflow.com and Zapier documentation. And as always, feel free to leave a comment or question below and we’ll do our best to help you out!