


Imagine…a new client is entered by one of your bookkeepers into QuickBooks Online (QBO), and you’re automatically emailed a notification acknowledging the action. But not only that—you also learn that they’ve been added to a running Google spreadsheet of all your current clients.
This scenario, and many more, are easy to achieve using a type of middleware integration software like Zapier. In this article, we’ll explain how easy it is to set that automation up, and we'll show you some other ideas, too.
Let's jump in!
Zapier allows you to connect thousands of different pieces of software together and create a simple “if this happens in one place, this happens in another place” logic.
The best part? Zapier offers free plans to get started. At the time of writing this article, they offer 5 free "Zaps" (5 automated tasks) and 100 automations per month. This could theoretically take 100 items off your to-do list every month!
Setup
Let's start with a basic example and pretend that you’ve got an accounting administrator who does basic data entry.
One of the tasks assigned to the administrator is to add all newly onboarded customers to an overview spreadsheet.
A task like this is a good use case for automation with Zapier, which will automate it by creating a new entry when the customer is added to another piece of software like QBO.
Sign up
The first thing you need to do to get started with Zapier automation is to sign up for an account. The signup process will ask you for a few pieces of information to set up your account and prompt you to create your first Zap.
here are the steps:
To start this automation, let’s create a new Zap, and choose QuickBooks Online as the starting app. This will be the application that will start the workflow.
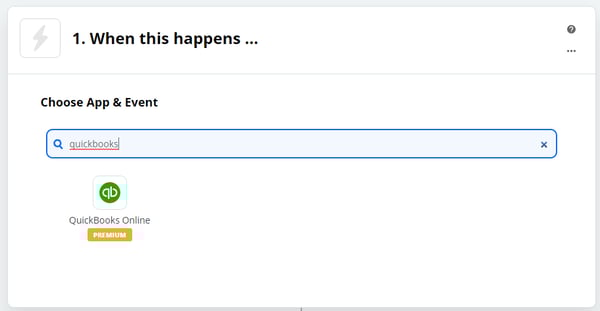
Next, we’re going to select the trigger event. This is what actually causes the Zap to run. For this example we’re going to use “New Customer” as the trigger.

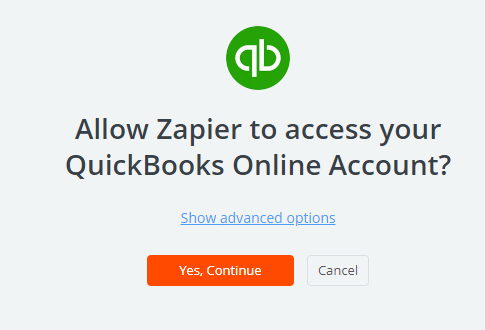
After clicking the “done" button, Zapier will ask to connect to your QuickBooks Online account. Press "continue", and follow the prompts to authorize the connection.
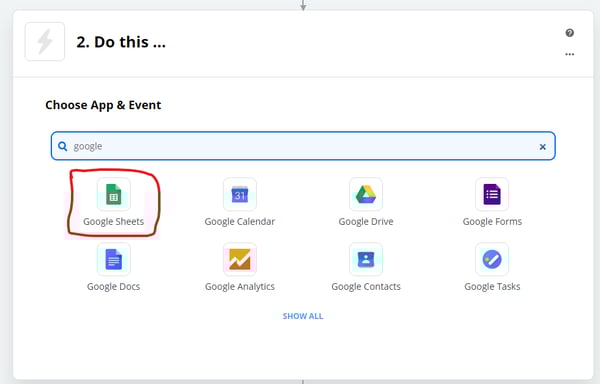
Next, we’re going to set up the action associated with this Zap. This is what we want Zapier to do. Since we want Zapier to update a Google spreadsheet, so we’re going to select Google Sheets from the list of apps.
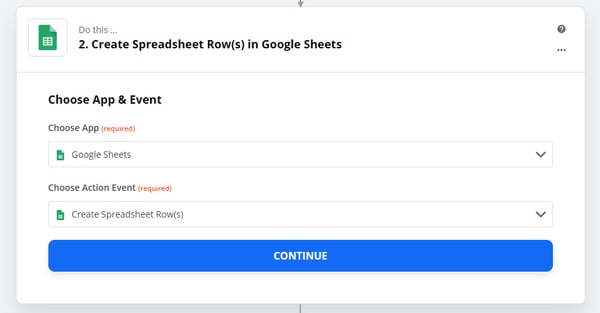
Next, let’s tell Zapier what we want to do with Google Sheets. We’re going to select the "Create Spreadsheet Row(s)" option.
Now we’ll select the correct account, and give Zapier access:
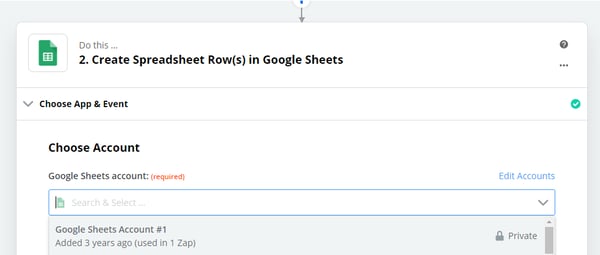
Next, select your Google Drive account, the spreadsheet you wish to update, and the worksheet where the clients will be located.
Once you create these connections, you’ll suddenly see the row headers populate as fields in Zapier:
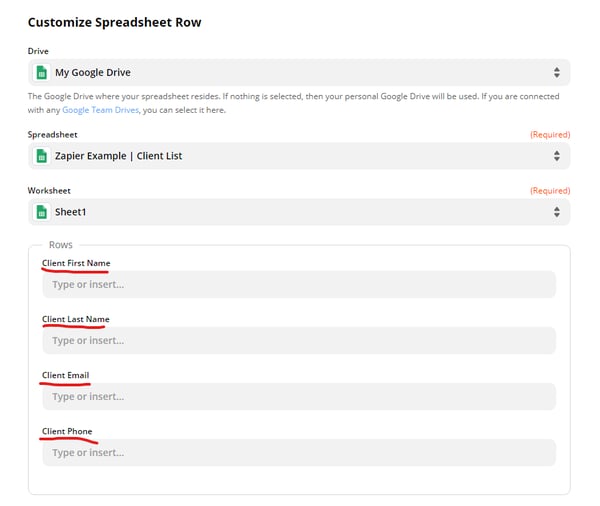
When you click into each field (where it reads “type or insert”), you’re mapping connections from the previous steps.
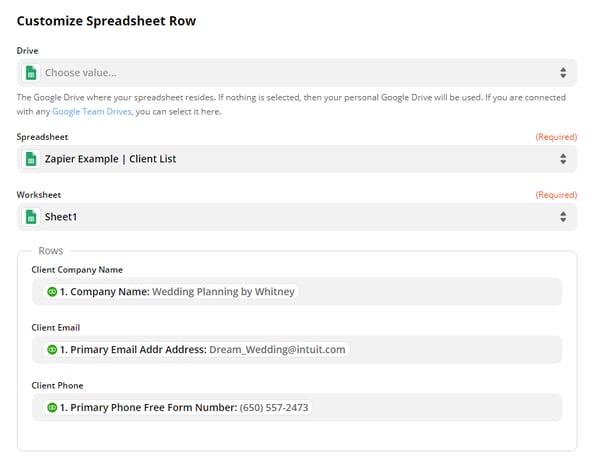
Select the “New Customer In QuickBooks Online” dropdown, which shows you all the available fields from the QBO company record.
We’ve mapped them like as such for this example:
Once done, click "Continue" to be brought to a testing screen.
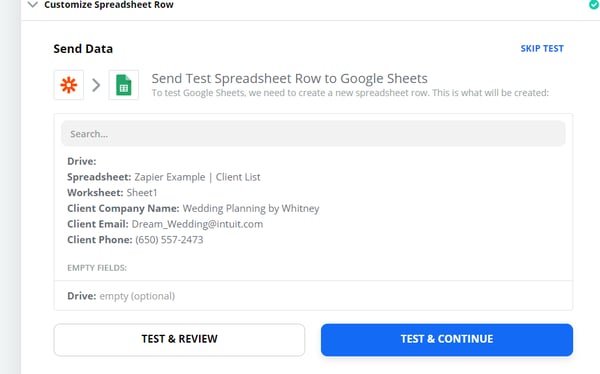
Click “Test & Continue.”
If all is well, you’ll see “Test was successful!”
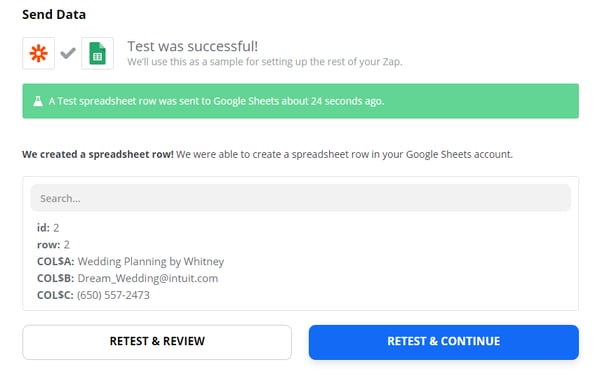
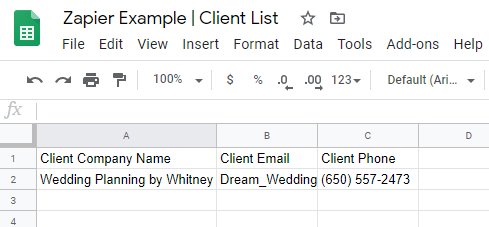
We can then go to the Google spreadsheet that was updated and see that the new row was added:
Final notes and hints
Automation can be a bit difficult to grasp at first. By starting with small tasks, you can gain some confidence and move on to bigger and more complex tasks. To help, we’ve compiled some hints below to assist you on your journey.
Use test accounts, environments, etc., before ReCORDING to a live data source!
For this example, I used a QBO testing account and a blank Google Sheet to test. I would do this for any new Zap I'm going to create to ensure that my data is being transferred correctly. Once you’ve tested your Zap and seen that the behavior is as you would expect it, you can then adopt what you’ve learned to live data sources.
Errors or inconsistencies?
If your Zaps aren’t quite working as you would hope, make sure that you double check your field mappings and data field types, that your accounts are correct, etc. I’ve found that most of the time a very simple mistake can wreak havoc on your automations! So it's best to test and verify.
Debugging
Did your Zap work perfectly the first time? Bravo!
But it's best to make sure you try again a few times using different data each time. Almost act as if you’re trying to break it. The more possible errors you can discover in the debugging phase, the less you’ll have to deal with using live data (and the more confidence you'll have moving forward).
After launching a new Zap, use the task history tool. This tool allows you to monitor all the live data passing through Zapier. You can also see failed tasks and find more information about why they might have failed.
Document what you just did!
Just as I’ve done with this example—it’s very easy to create a small knowledge base for yourself. Taking a few minutes to add screenshots and a quick explanation can save you a huge headache down the road.
Start small
When learning about middleware and automation, start with the basics. It’s easy to get overwhelmed, so start small and see what you're able to accomplish. There are lots of more advanced features and unlimited ways to add complexity, but it does get more difficult! Starting small is the best way to build your confidence and develop your skills using Zapier.
Still having issues?
If you still can't get the hang of it, there are some great resources on Stackoverflow.com and Zapier documentation. And as always, feel free to drop a comment or question below!