- Click the green “Add New” button in the top right corner.
- A connection popup screen will appear. If this is your first connection, accept the terms and conditions and click the “Continue” button. If you established a previous connection, the “Find Your Bank” screen will appear. You can now search for your financial institution or select from the popular institutions below. the search field:
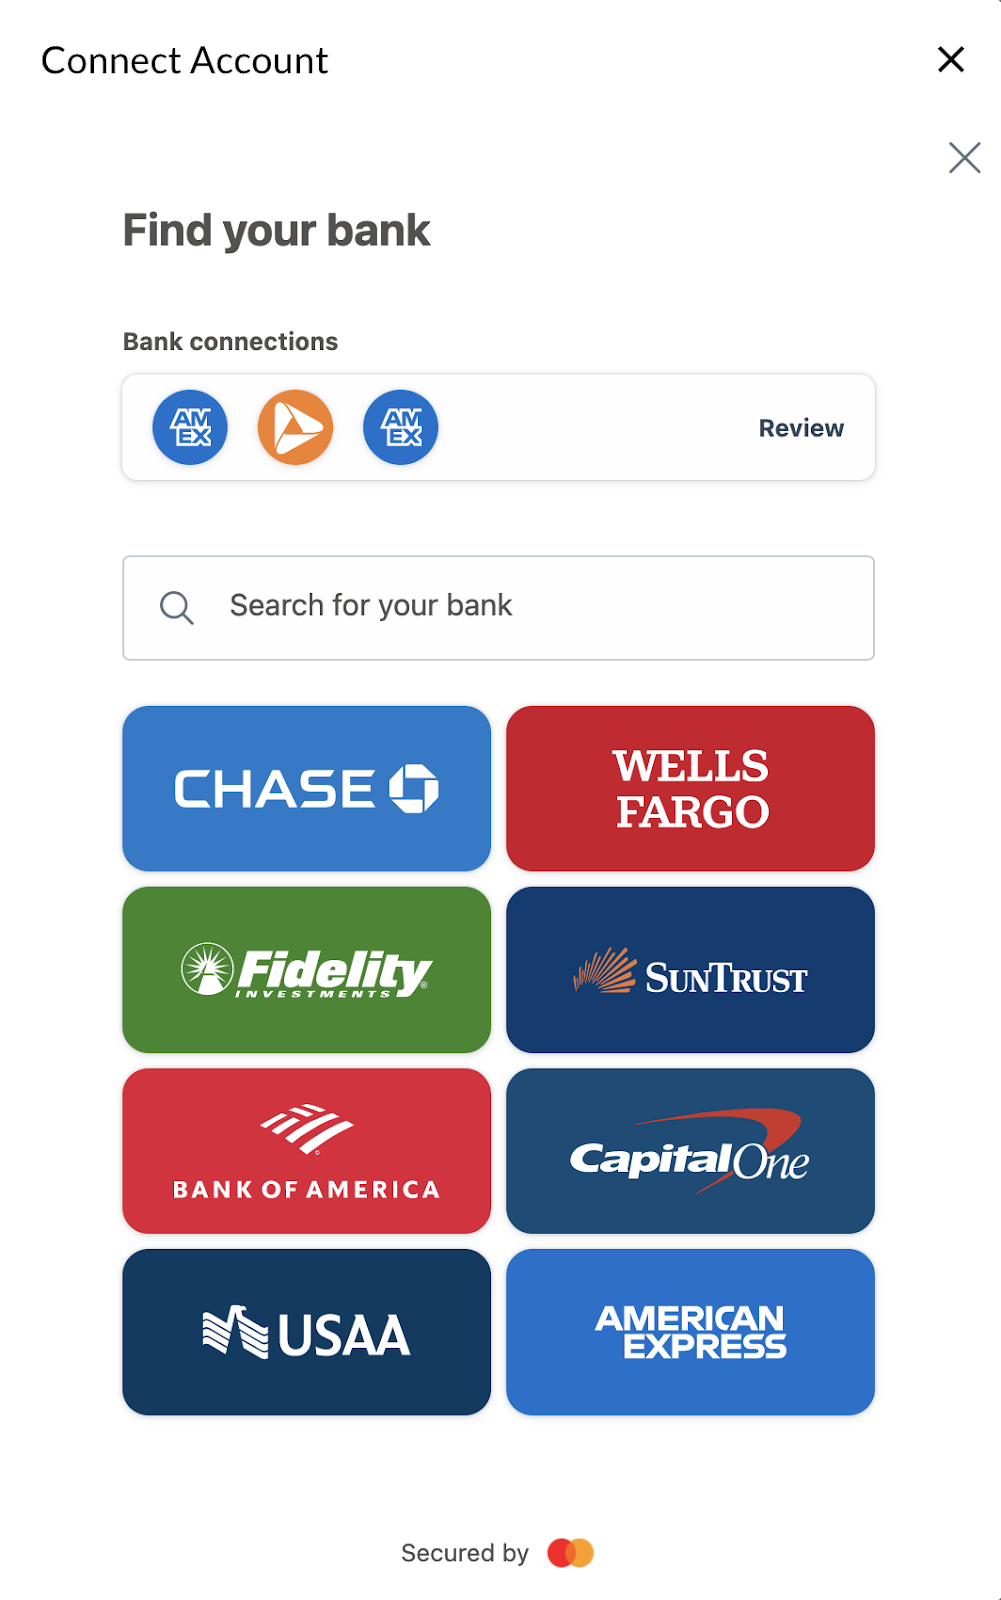
- Select the bank or credit card vendor and click the “Continue” button.
- Enter your user name and password and click the “Sign-In” button. This will begin the process of gathering your account details.

- From the options that appear, select the accounts you want to connect.

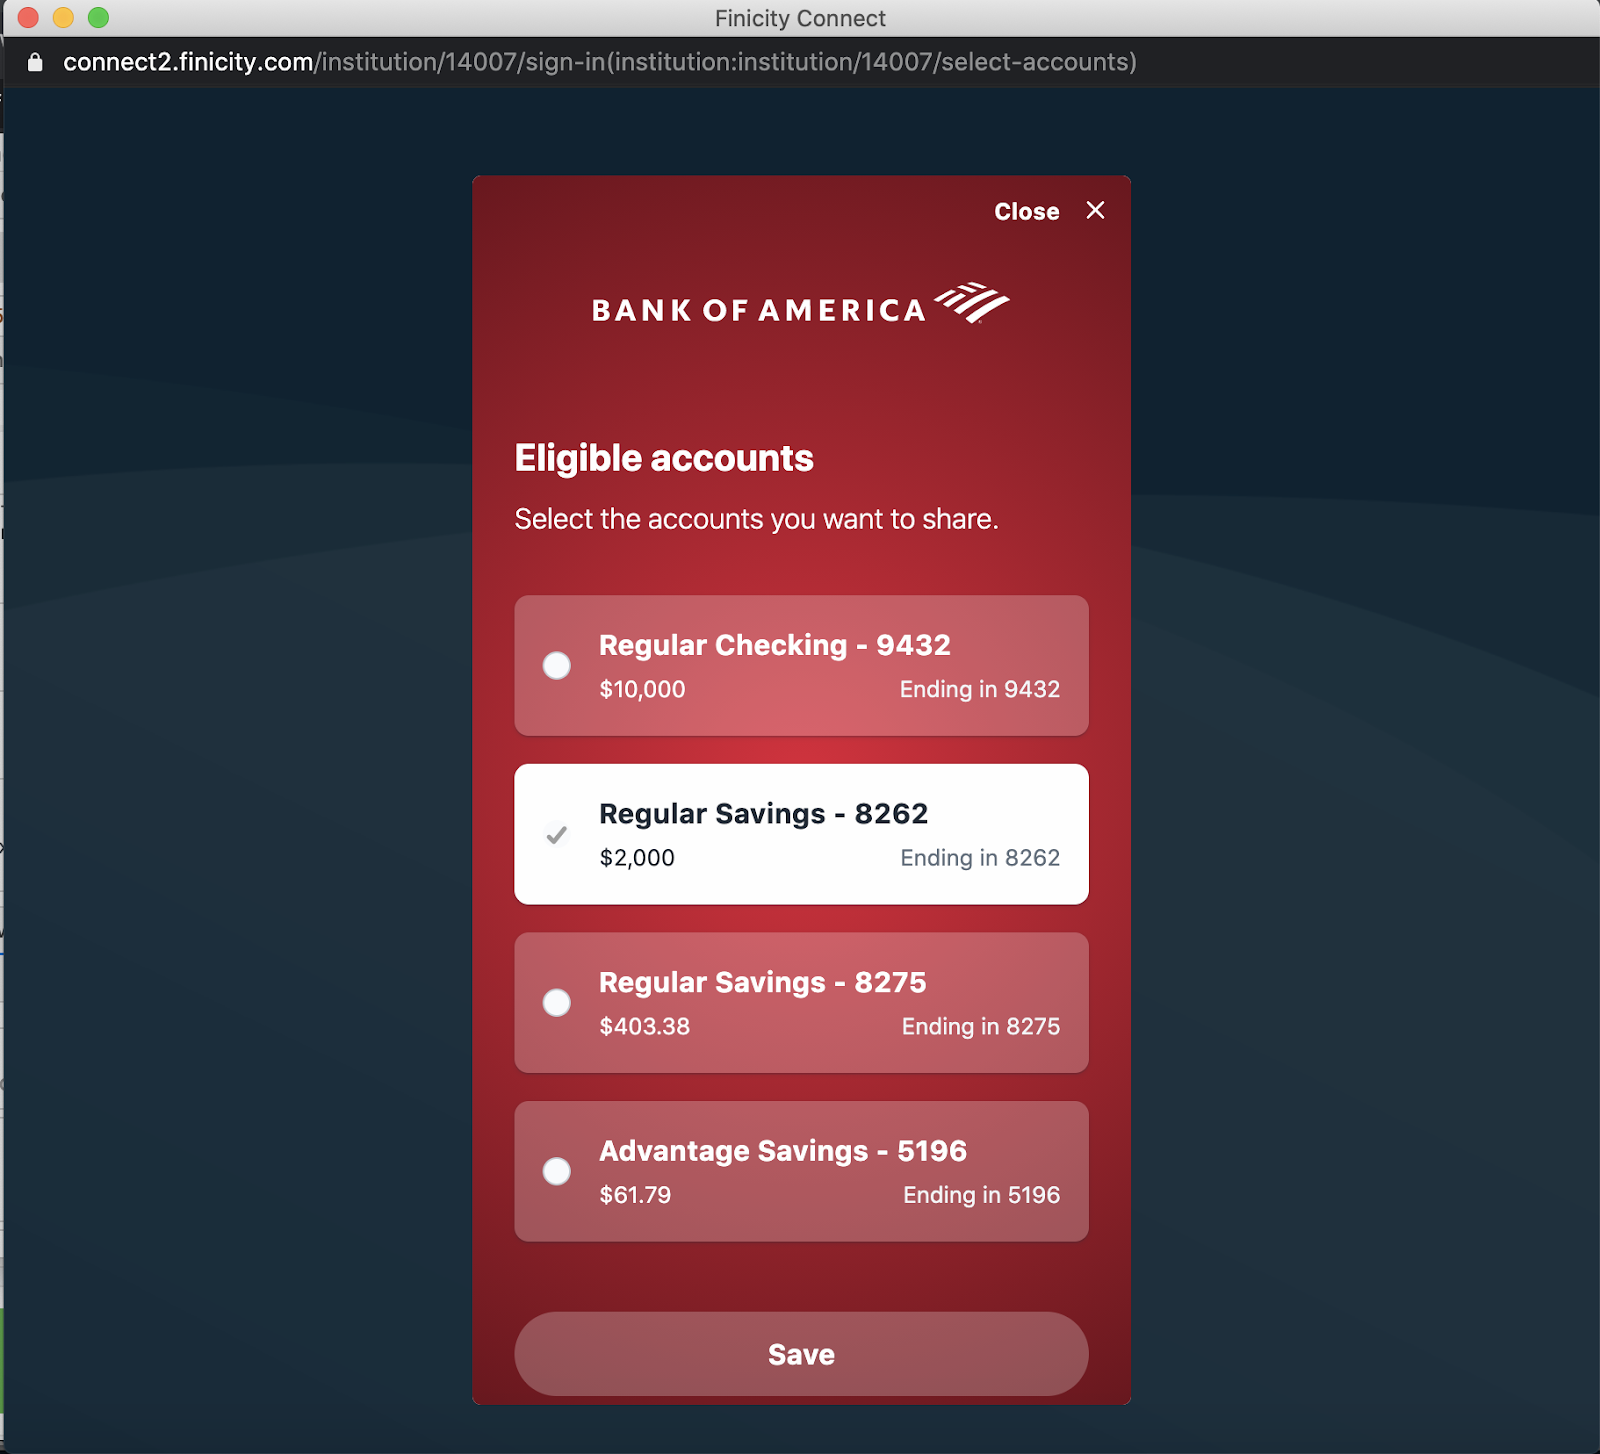
- Once you’ve selected your accounts, click the “Save” button.
- The final step is to review your connections and click the “Submit accounts” button.

- Once you click “submit,” you’ll get a success message stating Accounts Received. You'll now see the linking accounts modal.
- Link Smart Connect account to GL. Connect the client’s Smart Connect account directly to their general ledger.
NOTE: Without this linking, multiple pieces of functionality, including AutoPush, will not be available.
If you choose to skip this step, you'll be prompted to provide a reason why. Additionally, you'll be assigned a task to complete the mapping.
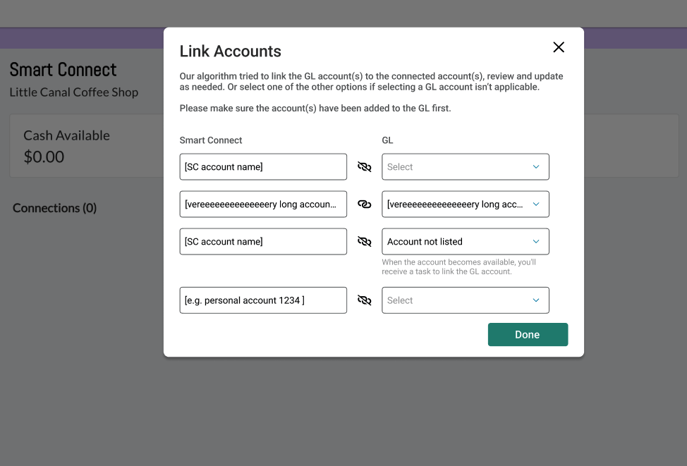
If your client clicks the Add Account button, or if you are requesting via a task for them to add the connection, it is the Partner’s responsibility to link the Smart Connect account to the GL account. Your client will not be able to complete this linking.
If you ever want to review the linking or change it, you can find this information within the connections table. Click into the institution card to get details, and expose the GL Account column. Click the drop-down to edit the link.